

All three kids needed a quilt or bedspread to fit their bed this year because they'd each moved up a size since their last one. Thankfully, Little Brother's and Firecracker's should last for a long time, since they're now in a twin size bed. I knew if I didn't get the quilts made for Christmas, it would be a long time before I got them done, since we'll be moving into our new house and having a new baby...all in a couple months.

A year ago, Firecracker and I went to Hawaii for her birth mom's wedding. While we were there we went to the big swap meet (seriously the place to go for cheap souvenirs when you're in Hawaii). Knowing then that Firecracker needed a nice bed spread, I let her choose some fabric. Firecracker's birth family has a lot of ties to Hawaii, and I thought it would be a fun way to remember the trip, rather than some cheap tourist trinkets (although we brought home a few of those too.) Then the fabric sat under my bed for pretty much a whole year.
I knew I needed to choose a simple pattern if I was going to be able to get three quilts done. Plus the big floral prints are so big and bright that I thought it would look too busy if I tried to do a pattern with more detailed piecing. I searched Pinterest for some easy quilt ideas and pinned them to my quilt board.
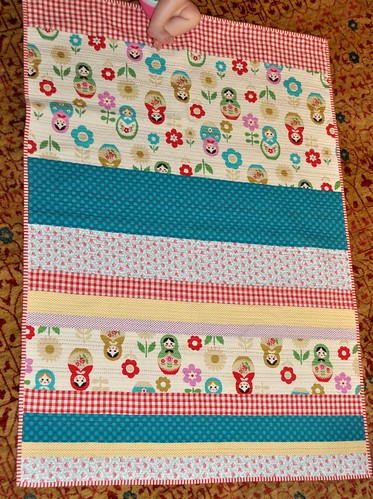
I had the yellow and brown solids in my stash, but there wasn't a lot left. They weren't quite long enough, so those strips are pieced together a little and I kept them thin, so they'd go farther. I think they help break up some of the flowers. And the quilt is still big and bright and busy...which is just how Firecracker is.

This quilt is approximately 60 inches by 90 inches. That's a little on the small side for a twin quilt, but Firecracker sleeps in a loft bed, so a lot of overhang on the sides would get in the way of the bars. This is just big enough to tuck in at the ends and around the sides of the mattress.
So here's what you'll need...
Decide how wide you want your quilt. Since mine was 60 inches wide, I started with two yards of each fabric, because it will shrink a little when you pre-wash it. You can get away with buying less fabric, but then you'll need to do some piecing to get long enough strips. (I had a lot less of the yellow and brown, so I had to piece those together.) 2 yards of 3 different fabrics gave me enough for the 90 inch long quilt, plus some strips left over for another project.
Then I cut out strips the length of my fabric using a quilting ruler and rotary cutter. I liked the randomness of varied widths, so I my smallest strips were about 2 inches wide, and I think my widest strips were 9 inches wide.

Once I had my strips cut out, I laid them out on the floor and arranged them the way I liked them.


After sewing each seam, I pressed the seams to one side. I find that easier than pressing them open.


For the back, I decided the cheapest way to buy the fabric was to buy 4 yards of fabric (just over double my width). Then I cut that into two 2-yard lengths. Since the fabric was just under 45 inches inches wide, it wasn't quite long enough for the quilt, so I used some extra floral strips to fill it in. A little nontraditional, but I like the interest it gives the back of the quilt.

To prepare the quilt for quilting, I used basting spray. I'd never heard of it until reading this basting tutorial from Heidi at Honeybear Lane. I love the stuff...and I don't think I'll ever be able to go back. She mentioned using pins to make sure the sides were secure...I didn't use a single pin and the basting spray held it perfectly.
I used bright pink machine quilting thread to machine quilt it...and I don't have a fancy sewing machine or anything. I just rolled the sides in.

I love the subtle decorative touch it adds.
And even though Firecracker got the simplest of quilt designs...she was thrilled with it Christmas morning.

I had fun using some of the scraps and trimmings to embellish the wrapping.

And she didn't even remember helping me choose the fabric.

The biggest challenge may be that she's used to dragging her quilts all over the house...and we're going to insist that this one stays on her bed...

...because it's actually a little difficult to "make" a loft bed. Click here if you'd like to see our favorite children's books about Hawaii.

(We love the front-facing bookshelves we put by each of the girls' bed. They're great for holding books, a sippy cup, etc. You can find the tutorial to make them here.)
Update: I used the strips I had left over from Firecracker's quilt to make a baby quilt for Firecracker's birth mom. She's expecting a baby girl in February. You can see more pictures of it here.

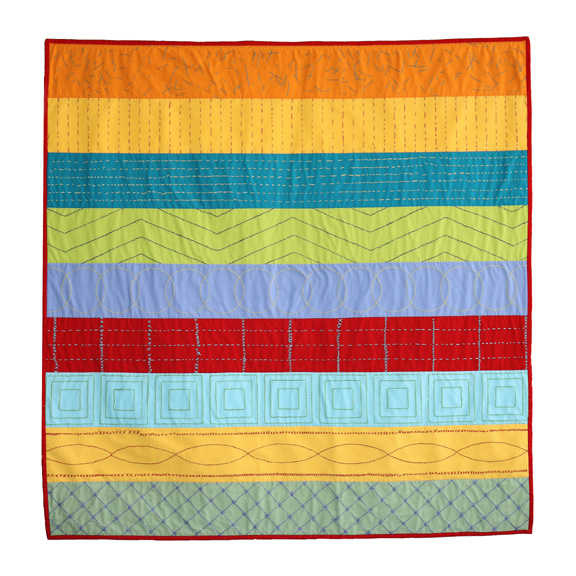
If you're thinking of making a quilt from strips, here are some of the quilts that I pinned for inspiration. Ultimately, I went for more of the look of this first one...although I love all the embroidery on the last.
Stripey Quilt from Alexis at Fifi and Florence.
Stripey Quilt from at Noodlehead

Please show my sponsors some love...
Sprouting Coconut Original Painting from nJoy Art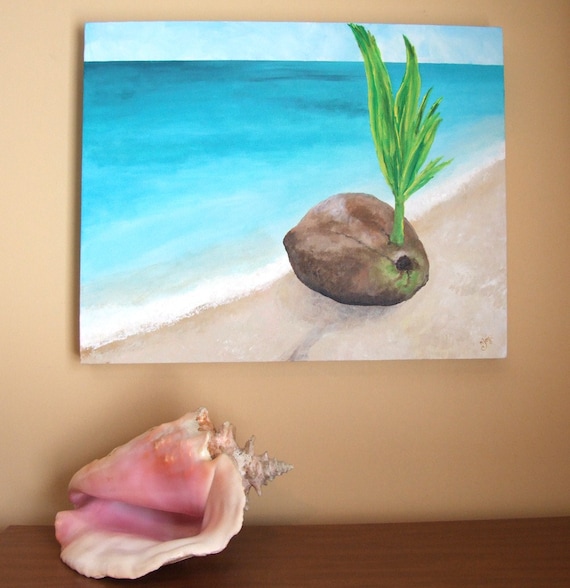 | Handmade Buttons - Set of 20 Cool Colors - From The Red Kitchen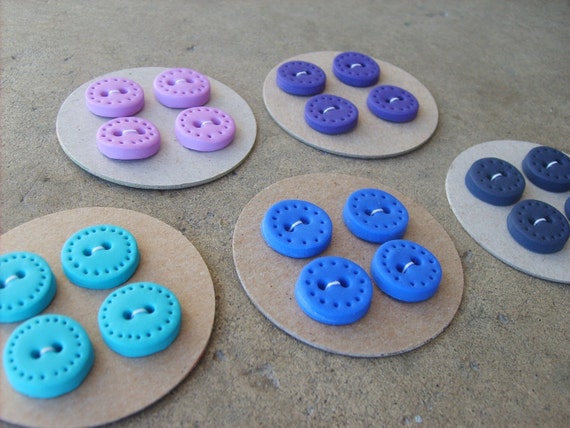 | Tropical Fish Original Painting Set from nJoy Art |
It is beautiful. I need to go finish up my daughter's quilt. I just need to finish the binding but needed to get some sleep last night. I promised she would have it for tonight. Thank you for sharing yours!
ReplyDeleteThis pattern almost looks like you could sew the strips to the back and batting all at once...not sure what they call that technique...
ReplyDeleteWow great write up! My wife is following it step by step. Thanks so much..
ReplyDeleteBeautiful quilt!! Love the strips rather than blocks.
ReplyDeleteBeautiful work
ReplyDeleteBeautiful! I also have a pile of fabrics from Hawaii that I have collected, some myself and some from other family members that go on vacation there. You are right about them being a fun way to remember a trip. I have one small quilt pieced in squares and I am thinking of a strip type for the others. I love how yours turned out!
ReplyDeleteWhat a beautiful, simple, and perfect quilt for a little Firecracker :)
ReplyDeleteNext quilt, I think I am using basting spray. I used fusible batting for the last one, and it didn't stick as firmly as I would have liked. That might be my or my iron's fault, too... but I still think I'll try basting spray next time. :)
OMG I love the fabrics in this!!! My daughter saw it and said "I want one"....:) Looks like I'll have to add it to my "to-do" list! Thanks so much for sharing how you did it. I am new to the quilting world and love looking at others' projects for inspiration. I am your newest follower and I would love to have you stop by my blog and check it out at http://littlebeckyhomecky.blogspot.com
ReplyDeleteIt's beautiful. The prints you chose look very good together and make it happy looking and fun.
ReplyDeleteJust wonderful and little one's and quilts nothing better
ReplyDeleteLove this! It is beautiful and so fun and colorful! Stopping by from TT&J
ReplyDeleteAmanda
everycreativeendeavor.comd colorful!
this quilt is SO pretty! You did a great job! The fabric is beautiful! I would love it if you would link this up to the Tuesday Talent Show this Tuesday at Chef in Training! I hope to see you next Tuesday!
ReplyDelete-Nikki
Chef in Training
http://www.chef-in-training.com
That is such a lovely quilt! I just adore the flower fabrics you used, and that darker fabric is such a great accent color!
ReplyDelete~Kimberlee, The Spunky Diva
Oh my word, you are such a busy lady! That is gorgeous and looks like it requires so much patience! Great job!
ReplyDelete