Showing posts with label ornaments. Show all posts

Monday, November 25, 2013

Harry Potter Christmas Ornaments & Stocking Stuffers

Looking for a fun way to commemorate yours or your child's first (or fifteenth) reading of Harry Potter?  These ornaments will do it.
https://www.etsy.com/shop/PiecesByPolly

We like to give our kids an ornament each year that somehow commemorates something important in their year.  This has definitely been a year of Harry Potter at our house, beginning with Katie's birthday party in January and continuing through our Halloween costumes.  I thought it was in order to come up with some Harry Potter Christmas ornaments.

And should you identify more with Slytherin...

It's rather convenient that the colors for the two most popular Hogwarts Houses are Red and Gold (Gryffindor) and  Green and Silver (Slytherin).  They just look so Christmasy...
https://www.etsy.com/shop/PiecesByPolly

..so I thought we'd have a little Christmas present to go along with each order.  How does a FREE Hogwarts Acceptance Letter sound...for EVERYONE who places an order in my shop through November 30. 2013.  This is a great deal!  I don't usually sell the Acceptance Letters in my shop, but elsewhere on Etsy they go for $10 or more...that's more than one of my ornaments costs.

Saturday, January 5, 2013

Harry Potter Potions Ornament

I know the timing on this isn't great...but I didn't even get it made until after Christmas and I'm afraid if I wait until next Christmas, I'll forget....so here's one you can pin for next year.

Katie started reading the Harry Potter books a few months ago.  We'd been telling her they were too hard, but she pulled the first one off our shelf and started reading them anyway.  It just goes to show that as capable as we think she is...we still underestimate her.  She's now read up through book 4 and has read books 3 and 4 twice.

Anyway, I thought a Harry Potter themed ornament would be good for her this year, since I try to find or make ornaments that show something about what our kids like or did that year.

And you can make one too...

Friday, November 9, 2012

Easy Quilted Monogrammed Christmas Ornament

Okay, don't hate me for posting a Christmas project, okay?  I've had Christmas gifts on the brain, but I haven't actually started any yet...unless you could the Christmas quilt I'm making for a charity auction.
This is actually a project I made last year for Becca.  She was (and still is) at an age where she thinks the letter of her name and the number of her age are super special.  This idea would also work well for first and last initials...or for a couple's initials.

I try to give my kids some meaningful ornament each year so that when they're older and just starting out on their own they'll have enough of a collection to decorate a small tree.  Anyway, I used to buy them, but every year I'm disappointed in the selection...store bought ornaments either seem to follow the same cliche themes and/or are really expensive...and/or look cheap and ugly.

So I thought this ornament would be special for Becca because she loves "B" and "2" so much and they represent so much of what she was learning over the last year.  This is also a great ornament for little ones because it's so easy for them to hang on the tree...just drape the ribbon over a branch.

Want to make one?  Here's what you'll need...
(I chose pink and purple because I let Becca choose the fabric...Santa didn't get this made in time for her stocking last year, but she didn't seem to mind.)

Here's what you do...

Monday, December 19, 2011

Cancer Ribbon Ornament

Ribbons of various colors are symbols for a number of things, so this could be adapted for other purposes too.  A yellow ribbon ornament could be a fun tribute to a family member serving in the military.

We have an extended family member who has recently started going through cancer treatment.  As I was getting pictures and packages together to send out, I decided last minute to whip up this little ornament for her.  At our house, we like to come up with ornaments for the kids that have some significance to what's been going on during the last year...and while cancer is nothing that anyone wants to celebrate, looking back several years from now, I'm sure the cancer will be seen as a defining event for the 2011 holidays for her.

I was rushing to get gifts in the mail, so I didn't take pictures for a full tutorial...but this was so easy, you won't really need one.  Here's a quick run-down though in case you want to make one last minute too.

Thursday, December 15, 2011

Mini-Book Ornament Variations and Giveaway Winners

We have some winners for the Ornament Giveaway!

It was so fun to hear all of your book recommendations.  There are several I need to hunt down at the library for sure.

If you're not a giveaway winner and want to make your own book ornaments, click here for the tutorial.

I also tried out a few variations when I made a few more.
  • No-sew option...I tried using my glue gun down the spine of the book to hold the pages in and it works great!  
  • Muslin page option...I ran out of white felt, so I tried using some muslin.  The muslin is easier to write personal messages on, which is nice.  On the other hand, it also results in a much thinner book, so it all depends on the look you want which one you'd prefer.

Saturday, December 10, 2011

Baby's First Christmas and Expectant Mother Ornaments

I've been to two baby showers in the last week.  (Yeah, our baby is going to have LOTS of friends his age to play with.)

One for a baby that's expected before Christmas in about a week, so he got a Baby's First Christmas Book.

Thursday, December 8, 2011

Easy Mini-Book Christmas Ornament Tutorial


If you're a regular reader, you know how much we love books at our house.  A couple years ago, I made Firecracker a felt book ornament to commemorate her learning to read.
I wanted to do something similar for Little Brother this year now that he's really reading too, but I wanted to think of something a little bit different.

Tuesday, December 7, 2010

Fun Christmas Projects

In case you're looking for some fun things to do with or for your kids, here are a few projects I've done in the past that I love.  (My apologies that most of these were photographed with our old camera and are not photographed as well as they could be.  Maybe I'll get around to taking new pictures of them this year...but probably not.)

Symbols of Christmas Tin - We used this for Family Home Evening again a week ago and the kids LOVED it all over again.  We gave quite a few away for gifts a couple years ago, and they were well received.  My sister-in-law just called me to find out more details about how we'd put it together because she wanted to make some as gifts.

Nativity Stockings - We're always looking for ways to help our Christmas celebrations be more centered on celebrating Christ (rather than Santa, etc), so I made Nativity Stockings.  I'm hoping to have an updated post soon showing the stockings I made for Little Brother and Sweet Pea, but here's the older link.

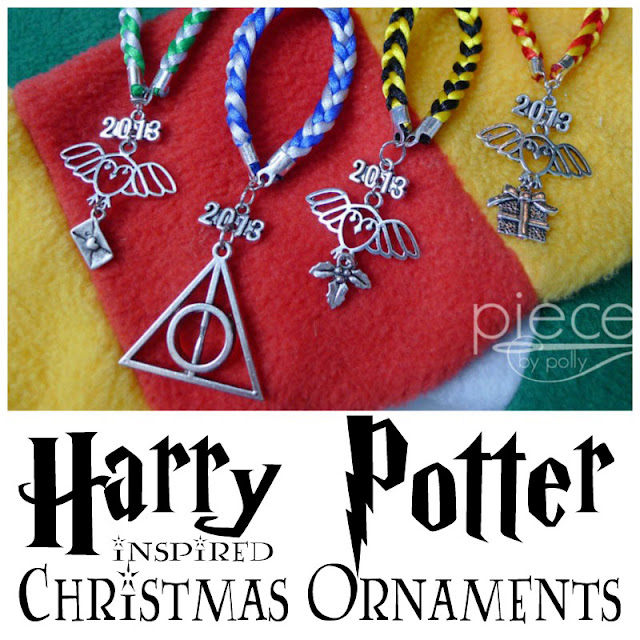
Christmas Ornament Ideas -  If you're like us, we try to give each child a Christmas ornament that symbolizes something about them for the past year. 

Last year I made a book ornament for Firecracker because she'd just begun reading.

Little Brother got a matchbox car ornament because he was (and still is) so in love with cars. 

Hubby got a graduation ornament made by adding a graduation cap to his old student ID card because he'd just finished his PhD. 

Sweet Pea got a Baby's First Christmas ornament made from an special baby bootie we'd been given that she could no longer wear.

I also did a repurposing project where I made a hat and scarf out of an old sweater and some fleece scraps.

And if you're looking for more great idea, my friend Maria is hosting a Christmas Linky at Busy as a Bee in Paris with ideas and traditions for making your Christmas more meaningful.  You can go and check out her ideas too as well as the ideas that people have linked up.
Photobucket
And I should have a few new ideas up for you soon!

Wednesday, December 30, 2009

Car Ornament: The Twelve Days After Christmas

Okay, here's the last of this year's Christmas ornaments. I have some cooler projects coming up, but the ornaments are easier to write about so they're coming first. :)

Boy LOVES to play with cars. He's loved it ever since he was about Sweet Peas age and his enthusiasm for them as never wavered. He also loves purple. We think this started in imitation of his sister. He can sometimes identify other colors, but ALWAYS gets purple right.

So here's Boy's $0.99 ornament. I looked through the Hot Wheels until I found a purple one, and bought it. You can find them just about anywhere for around a dollar. I've found past years' models at hobby shops for as low as 50 cents or if you look early, you could find them at garage sales for even less.

I tied some recycled yarn through the windows. I put a couple of globs of hot glue in the car, through the windows to hold the yarn in place. Tied the ends in a knot and then in a bow, and wrote 2009 on the top of the car with a permanent marker. That's it. The part that took the longest was waiting for the glue gun to warm up.

Tuesday, December 29, 2009

Felt Book Ornament: The 12 Days After Christmas

As I mentioned before, I found myself needing some last minute, but meaningful Christmas ornaments for the kids this year. Firecrackers big accomplishment over the last year has been learning to read, so I thought I would make her a book ornament. I got this one done quickly and in one sitting while Hubby took the kids to the park. I used a sewing machine, but you could easily do it all by hand.

Materials: Red and white felt (one sheet of each should be enough, but you might need two sheets of white depending on how many pages you want.), scraps, embroidery thread, beads or other trim for decorations, needle.I cut one rectangle out of red felt, and three out of white felt. The red rectangle here is 4 inches by 6 inches, so the finished book is 3x4 inches. The white felt is 3 1/2 inches by 5 1/2 inches, so they're just a bit smaller. I cut some green felt scraps in the shape of holly leaves and used some beads I had on hand.
I layed things out on the cover and wrote Firecracker's name and the year in pencil. Then I went over it with white embroidery thread. You could do this step with a paint pen or fabric marker, but I didn't have those on hand. Don't worry about what the back looks like because it will be covered up.I sewed the leaves on by hand with just a stitch down the middle and ended up really liking the effect. I'd also planned on using more beads, but liked how it looked with one.
If you want to cover up the back of your stitching take one of the pieces of white felt and center it on the back of your cover. Sew around all four edges to secure it, being careful of the beads. This is like the "paste down" of a real book. (Thanks to my bookbinding sister Kendra for teaching me about those.) Sorry I forgot to take a picture of this step.
To add pages to your book, pin the other pages to the cover down the middle and sew using a sewing machine or you could do this by hand.

Then I trimmed those inside pages just a bit, so they weren't sticking out beyond the cover. Then to finish things up all you need to do is attach the ribbon to hang it on the tree.

Monday, December 28, 2009

Graduate Ornament: 12 Days After Christmas

I had several other ideas for ornaments to commemorate Hubby's graduation that I liked better...but it's hard to find small graduated cylinders when every educational institution in the country is closed for Christmas break.
So...here is it is...easy peasy Christmas ornament to commemorate your favorite graduate. It's a little late for this year, but this give you plenty of time to snag the materials for next year. Sorry there aren't more pictures of the steps, but my camera was acting up.

Materials: Student Body Card belonging to your favorite graduate, scrap of black felt, small piece of embroidery thread, needle, glue gun, drill or hammer and nail.

Cut out the black felt in the shape of a mortar board. Thread your needle with embroidery thread. I used three strands. Tie a knot in the end of the embroidery thread with a little bit of a tail. this is going to become the tassel. Go through the felt with your needle FRONT to back, so your knot is on FRONT. Use just a tiny bit of glue to hold the tassle in place the way you want and a glob of glue on the back to hold the thread in place. Then glue the hat onto the picture on the student body card.

Use a drill to make a hole for your string. I put a small block of wood under the card, to protect the table. If you don't have a drill, you could use a hammer and nail. Put yarn or string through the hole to hang your ornament with.

You're done! The whole thing took me about 10 minutes to make and was virtually free since I had everything on hand.

Saturday, December 26, 2009

Baby's First Christmas Ornament: 12 Days After Christmas

Everyone in our family gets and ornament each year. I try to find ones that have some meaning for something the kids' did that year. The last several years, I've been a bit disappointed with the selection in stores...at least stores with affordable ones. With only 2 days to Christmas I realized I hadn't done anything for ornaments yet...and even if I wanted to buy them, stores aren't as close to get to these days.

This is what I did for Sweet Pea. Someone gave us these booties for Firecracker. They're totally adorable...but a little impractical for actually wearing. I've felt bad that the kids never wore them when they'd been handmade and are so stinkin' CUTE!
So I took some unravelled yarn left over from another Christmas project I'll post about later and added Sweet Pea's name to one side and 2009 to the other side.

Then I filled up the bootie with stuffing...uh...well...actually...fleece scraps to keep it filled out in a nice shape. (I used to drive my mom crazy saving "useless" scraps. Now I drive my husband crazy with it...but they do come in handy.) I think it turned out pretty well. Now I just have to figure out who to make the other one into an ornament for. I think this would work great with pretty much any bootie or even a baby sock. You would probably want to use embrodery thread instead of yarn if you're doing a sock.

This would also make a great shower gift for anytime during the year for a new mom to use for next Christmas.