

All three of my kids needed a nice quilt or bedspread to fit their current sized bed. They'd each outgrown their previous bed since getting a nice one. I knew if I didn't get them done before Christmas, it probably wouldn't happen for another year. Of course I could have gone and bought bedspreads...but the truth is that quilts are my absolutely favorite craft...and I don't make them all that often.


Little Brother used to LOVE cars, and he still likes them, but I wanted to branch out a little for his quilt. Recently he's been really interested in the sun and planets, so I thought a solar system quilt would be a fun challenge and a theme that could grow with him for a while. Besides my husband and I are complete math/science nerds (I taught math and chemistry before we had kids, and he's a high school science teacher), and we're doing our best to turn out kids into them as well...without them even realizing it.


Christmas morning after opening it...
Little Brother is super happy with his quilt and calls it his "Sun is a mass of quilt..." after this awesome song that he can sing pretty much by heart. (Like I said...we're turning them into nerds and they don't even know it.)

And as complicated as this quilt might look...it really went together really fast, since it's all applique except for the borders and sashing.

The hardest part of the whole thing was figuring out how to take a decent photograph of something that big...seriously...see what lengths my Hubby is willing to take to help me get some photographs. (It was a windy day so simply hanging it wasn't an option.)

Yep, Hubby is even more awesome than the quilt. ;)

Seriously, though, this is totally something do-able if you've got some basic sewing skills. I'm not going to give all the details about how to do applique here. I gave quite a few applique tips in this post about the Bird and Bunting Quilt I made for my youngest or you can see my satin stitch tutorial here.

I am going to give you the template and measurements to make a twin size quilt though. The finished size of this quilt is about 60 x 90 inches. That's a little on the small size for a twin quilt because this will be going on a loft bed once we move into our new house. If you want a quilt with more overhang, then you'll need to increase the size of the borders.


My husband and I wanted the quilt to be somewhat scientifically accurate while still being fun to look at...meaning we wanted the sizes of the planets to be relative...but to really make that accurate, you'd barely be able to see anything except the sun and maybe Jupiter. We also took some creative license with some of the colors to make it more fun to look at and to work with the fabric we had available.
I came up with the layout by gathering up a bunch of different sized bowls and laying them out until it looked right.
Fabric: For the top all fabrics were 100% cotton quilting fabrics. I pre-washed them and they DID shrink, so be sure not to skip the washing.
- 5 yards of your background fabric. (Enough for twice the length of your quilt between the yellow stripes and still leave some extra for shrinkage.) I used Robert Kaufman Stargazers in Midnight Blue from Joanns (make sure to get it on sale or use a coupon).
- 2 1/2 yards of of your sashing fabric (the yellow). You could get away with less if you want to do some piecing.
- Scraps or fat quarters for the planets. The background/flame part of the sun took an entire fat quarter with barely any scraps. I tried to choose mostly abstract/random looking patterns and stay away from prints with things like floral designs. I usually buy fabric off the bolt rather than fat quarters because you get more fabric for your money...but in this case, I ended up mostly using fat quarters because the fabric colors/patterns of the fat quarters Jo-Anns had the day I went ended up being better for this. (I ended up not using all of these...and used some fabrics not shown that came from my stash.)

- A 2-3 yards of Heat'n Bond Lite or similar product. (Sorry, I don't have an exact measurement for this one.)
- For the back, I was super cheap and bought 4 yards of Broad cloth and had it go across the quilt with a strip of yellow in the middle to make up the difference.
Solar System Quilt Templates
Solar System Quilt Template - Earth
Solar System Quilt Template - Planet Sizes
Solar System Quilt Template - Saturn's Rings
Solar System Quilt Template - Sun Page 1
Solar System Quilt Template - Sun Page 2
Solar System Quilt Template - Moon Page 1
Solar System Quilt Template - Moon Page 2
Cutting your Fabric
The center blue panel used the entire width of the fabric (about 40 1/2 inches after it was shrunk some in the wash.) by 70 1/2 inches long.
I also cut two blue strips 8 1/2 inches wide and 70 1/2 inches long. As well as two blue strips 8 1/2 inches wide and the entire width of your fabric (for me that was 40 1/2 inches). (I actually cut these a little extra long just to give some wiggle room and then trimmed them.) You will also need four 8 1/2 inch squares.
 Putting your Quilt Together
For all seams I used 1/4 inch seam allowances and pressed the seams to one side.
I started by sewing the yellow strips onto the sides of the middle panel and trimmed their edges. Then I sewed the blue strips (8 1/2 inches by 70 1/2 inches) onto the sides.
Next I sewed yellow strips onto the top and bottom of the quilt and trimmed them.
Now you're going to make the pieced strips for the top and bottom. You'll sew an 8 1/2 inch blue square to a 8 1/2 inch by 2 1/2 inch yellow strip, then to an 8 1/2 inch by 40 1/2 inch blue strip, to another 8 1/2 inch by 2 1/2 inch yellow strip, and then to another 8 1/2 inch blue square. You'll do this twice...once for the top of the quilt and once for the bottom. Then sew these onto the quilt.
The Applique
I used Heat'n Bond Lite for my appliques. You'll need to trace the templates onto the papery side of your Heat'n Bond. You'll notice the template for the earth appears to be backward. This is because images traced on Heat'n Bond will appear in reverse. The earth is the only planet this will matter for, since all the others are just circles. For the earth, you will want to cut out the whole circle in blue and then the green land pieces will go over your blue circle.

When you're using the pieces for the moon, you'll need to cut out two full circles of white for the full moons, and two full circles of black for the new moons. For the waxing and waning moons, you'll need to cut out one black and one white version of each piece. Cut the white version out along the solid line and the black version out along the dashed line. Then when you put them together to make a moon, the white will overlap the black slightly. (And if you're looking to simplify the quilt...leaving the moons off entirely is always an option.) The moons are waxing at the top and waning at the bottom...and it doesn't matter if you turn the quilt around because they will still appear to be waxing at the top and waning at the bottom. (If you live in the southern hemisphere you'll want to orient them differently, though.)

You'll notice the white stitching goes over the black fabric...and I thought I did a decent job finding crater-like fabrics.

Once you have all your pieces traced onto the heat'n bond, cut them out, and iron them onto the BACK side of your planet fabrics. Then cut these out again. Peel the papery backing off.
To place the planets, I laid the quilt base out on my living room floor and moved the planets around until I was happy with their placement. I've always loved quilts that break beyond their borders a bit, so I had the planets extend over the yellow sashing. This also gives a little more room for the solar system to spread out. You could easily leave the phases of the moons off and have the solar system extend into the ends as well.
Once I was happy with their placement, I ironed them lightly, right there on my floor (make sure your carpet can tolerate it.) It was enough just to keep them in their places while I moved it to the ironing board to iron them on more thoroughly. Make sure to CHECK ALL THE EDGES to make sure they seal. It will make the sewing a lot easier.
Then I used a satin stitch with matching thread to sew around the edges of each planet and moon.
Here are some close-ups of the rest of the planets to give you a better look at the stitching and fabric choices...
The sun...


Jupiter...I was super happy to find this fabric...I think it looks like it's got the storm spot.


And even though Pluto has become the outcast and is no longer classified as a planet, we included it on the very edge of the quilt. I think it's more of a "rock" color, but we made it purple since it's so far away and dark.

Quilting
I machine quilted this on my regular old sewing machine...you don't need a fancy machine for it. I did use most of the tips from this basting tutorial from Heidi at Honeybear Lane. Let me tell you...I AM IN LOVE with BASTING SPRAY. I can't imagine trying to machine quilt all the circles in this solar system quilt on my little machine without it. There wasn't a single pucker on any of them. After reading different reviews online, I ordered Sullivan's basting spray when it was on sale a Joanns. Since it's the only kind I've tried, I can't say it's the best...but I can say that it works and I love it.
I did all the quilting on the blue background fabric with navy blue machine quilting thread. I sewed around each planet and moon (not through the moons or the sashing though) and around the sides edges of the sashing. It's really hard to tell in most of the pictures, but I also quilted the orbit lines of each planet. (You can see them a little in some of the close-ups and in this picture of the back.) I was hoping the orbit lines would show up a little more, so I may go back and quilt those with white thread...or I may not.


And once the ideas started flowing for his quilt, I've started adding some other spacey details to Little Brother's room, and I'm sure I'll be adding a few more after we move into his "real" room.

But for now he is completely happy with his quilt and new pictures for his walls.

You can see see more details about how I put together the "I Love You to the Moon and Back" print here. The other spacey artwork in his room came from nJoy Art.

As soon as I saw this solar system print, I knew we needed it to go with the quilt, especially since it has a bit more whimsy. (This print is not currently offered in her shop, but Nicola of nJoy Art loves custom orders, so she could probably paint you another.)

If you have any questions about how I put the quilt together feel free to ask in a comment (PLEASE make sure I can email you back...it makes me sad when people ask a question and their email comes up as no-reply... You can also email me questions directly.)
I've also got some other fun outer-space themed posts coming up, so be sure to check back.

If you'd like to to see some other solar system quilt inspiration, check out my quilts board on Pinterest.
You can also see more of my quilting projects here.
Please show my sponsors some love...
Personalized Rocket Plaque from nJoy Art | Faith in God Makes Me Stronger from Shirleen Bland's Art Studio | Flying Saucer Original Painting from nJoy Art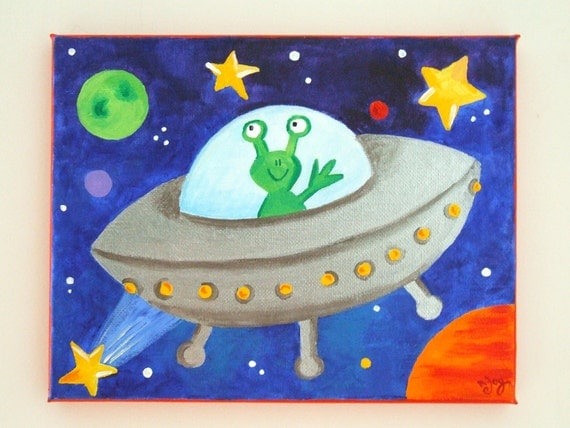 |


You did a wonderful job!! We have a sharing party every Saturday and would love for you to share at it.
ReplyDeleteCarrie
http://craftymomsshare.blogspot.com/
Great job, Polly!
ReplyDeleteWow, my son wants to change places with your son! Can he come over tomorrow? ;)
ReplyDeleteBeautiful quilt.
I love the way you kept it (mostly) true to science while creating a beautiful artwork for Little Brother to cuddle with and enjoy! He must feel very important.
ReplyDeletewhat a great quilt and fantastic tutorial. thanks so much
ReplyDeleteWOW WOW WOW!!!!! You did an Amazing job on this Quilt... Love it and what a FUN and Fantastic way to learn all about the Solar System... Thanks for sharing it...
ReplyDeleteCan't wait to make this for my little guy one day!!
ReplyDeleteLove it!
ReplyDeleteWOW!! You are awesome. And way to keep Pluto included. :)
ReplyDeleteIt is just amazing! I passed it along to my crafting group so that they can all see how beautiful it is. Some of them are quilters too! Your piece and quilting is magnificent!
ReplyDeleteThis is a great quilt! Thank you so much for sharing!
ReplyDeleteThat is one amazing quilt! Love the design and the bright colours!
ReplyDeleteI would love if you came over and linked this project to my weekly Round Tuit party at:
http://jembellish.blogspot.com/
Have a great week!
Jill @ Creating my way to Success
This quilt is incredible. How impressive.
ReplyDeleteThat quilt is awesome! My son is a space junky too, so I am definitely pinning this one, as well as some of your other ideas. Thanks and fantastic job! :)
ReplyDeleteThat is awesome!! How creative!! You got some great pictures too. That is a quilt that will be treasured forever. Good work!
ReplyDeleteBeautiful quilt. So generous of you to share the pattern as well. Nicely done!
ReplyDeleteThis is awesome!
ReplyDeleteMy husband is an amateur astronomer and I've been looking for a quilt to make for his camping trips. I think you have the perfect quilt for my own man/child.
ReplyDeleteAWESOME job!!
To top the theme off you might want to consider something like this:
ReplyDeletehttp://www.thinkgeek.com/geek-kids/7-13-years/ea58/?srp=4
I think I have some of that background fabric. I like that you did it all on a home machine. I need to learn applique and what a satin stitch is :)
ReplyDeleteMy son is crazy about the solar system and I love this quilt. Thanks so much for your fantastic directions. I can't wait to get started.
ReplyDeleteThank you so very much. I have been trying to find a solar system quilt pattern for ages.
ReplyDeleteThank you so much for posting your quilt. I made a baby quilt for my first grandchild using your templates and reducing to 75%. I used ric rac around the sun, and quilted with yellow thread. It turned out great and so did the baby - a girl! Let me know if you'd like to see a picture. :)
ReplyDeleteI'd LOVE to see a picture Amber!
Delete