
'Tis the season to make sure our little guys have a spiffy new set of church clothes. With my older son, his church clothes used to drive me crazy...particularly the shirts. He looked so cute dressed up, but the button-down shirts seemed bulky and uncomfortable for such a little guy, and the shirts never seemed to stay tucked in...not to mention trying to get a tie to stay on a little guy.
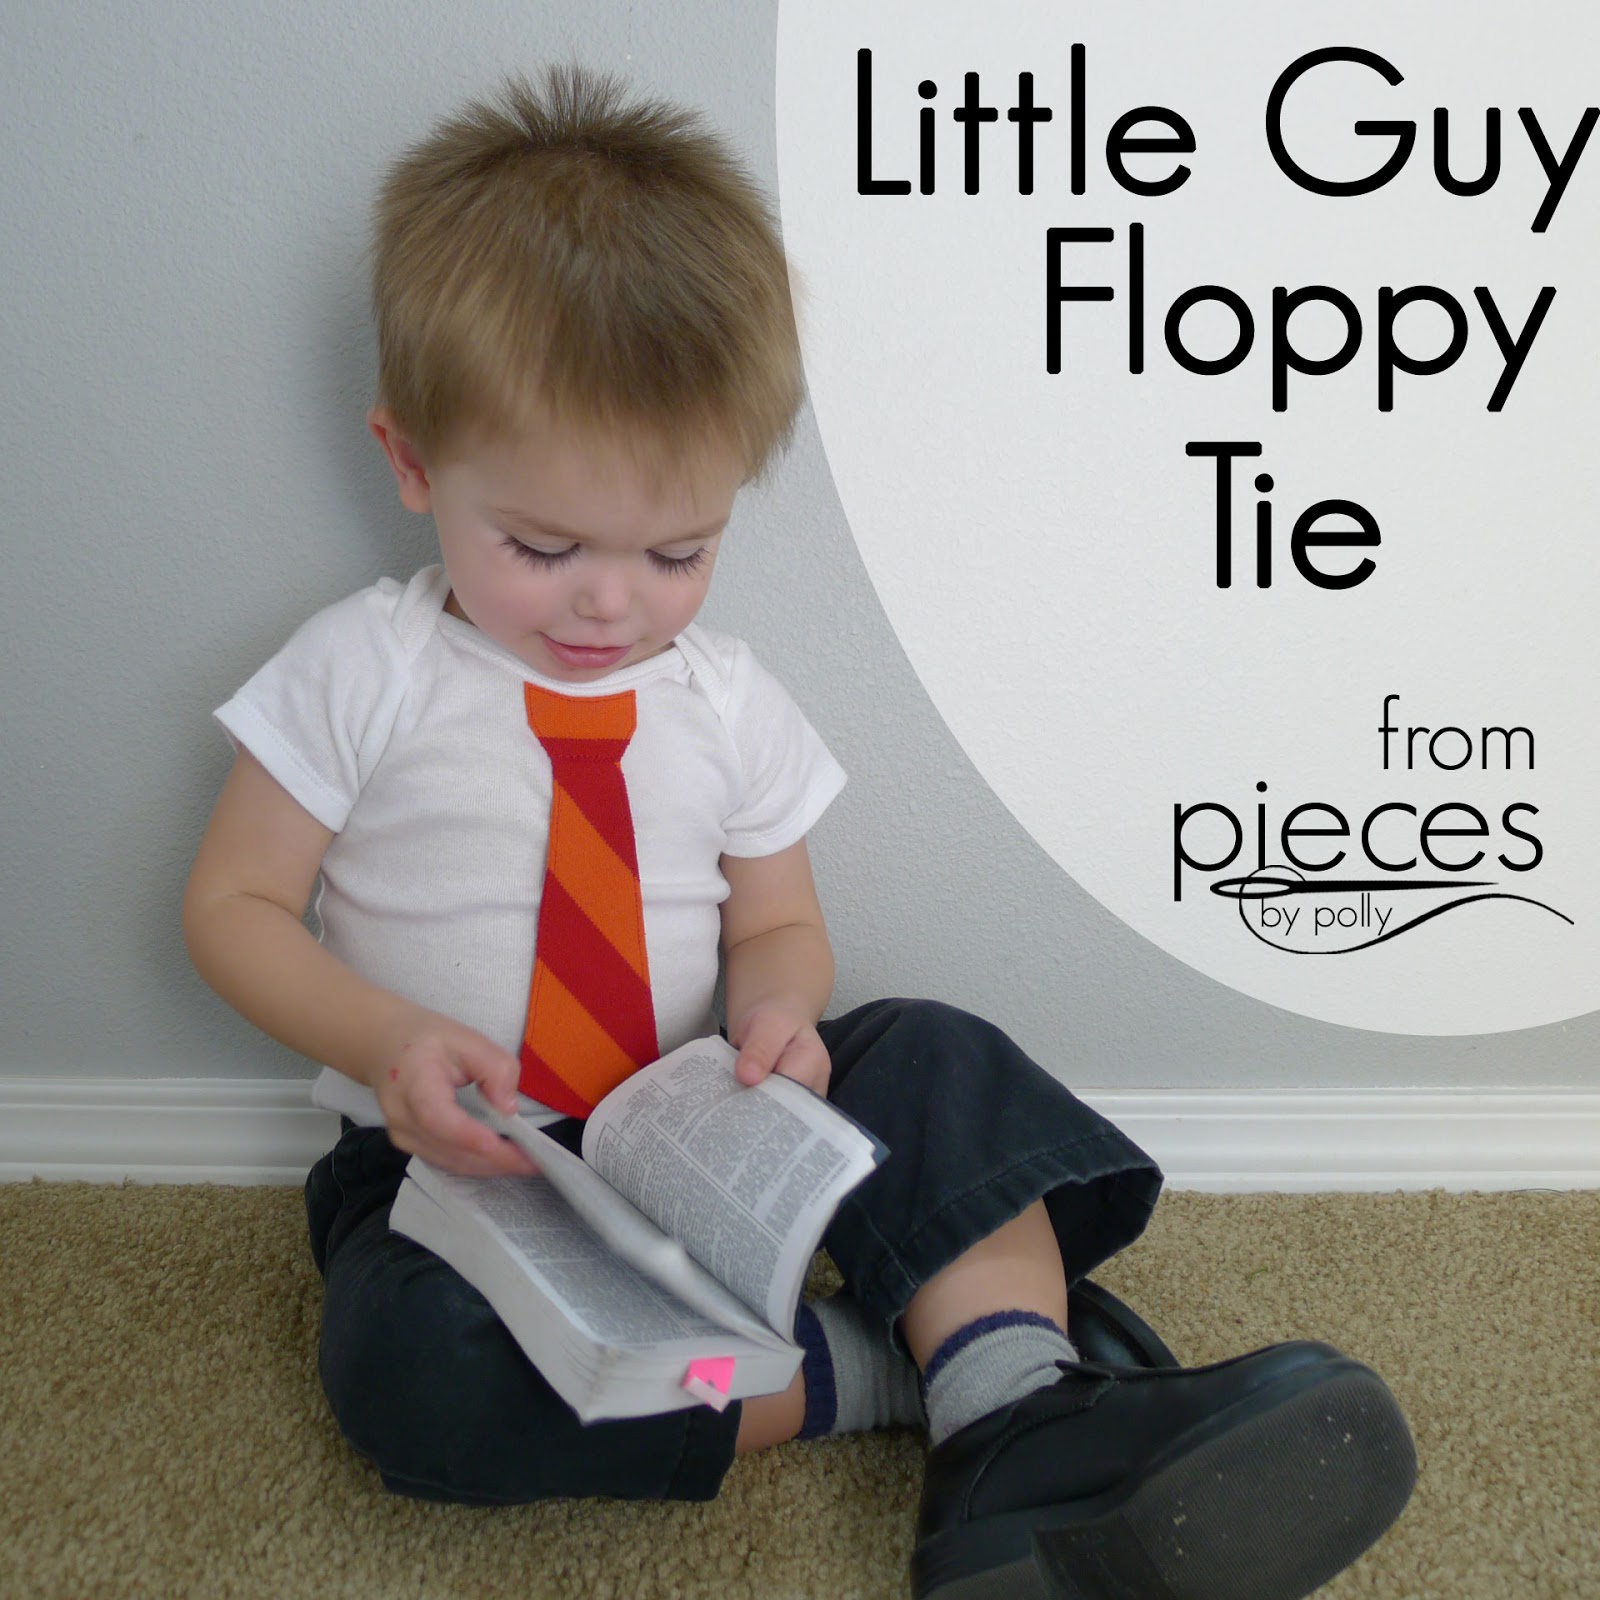
So with our youngest I've gotten smart and made him tie onesies. I've made a couple versions, but my favorite is this Little Guy Floppy Tie onesie. This puts a new twist on the classic tie onesie.


Instead of having the whole tie sewn onto the shirt, the tie is loose and just the "knot" part of the tie is sewed down.

My little guy loves having the tie to play with. I love that I don't have to fight him to keep the tie on and the tie never gets lost.

I just made my youngest this new shirt because he'd outgrown his previous one. His first shirt got a TON of compliments. My husband keeps trying to convince me to sell them in my shop...but I haven't added them yet.

And tie-onesies are super easy to make.

Supplies: You'll need...
- a onesie
- a fabric scrap for the tie (knit-T-shirt like material)
- Heat'n Bond Lite or similar product
- Printed Tie Pattern. 12-18-month size here, Newborn size here (You need one in between, just modify the pattern. It's pretty simple.
- your typical sewing stuff (machine, thread, scissors, etc.) P
I prefer to use knits with bold colored stripes. If you use knits (like from a T-shirt) the edges won't unravel, so we don't have to do anything special to them. My favorite is when I can find irregular striped knits...but those are hard to find. I used those black and white stripes for his last tie onesie, so this time I chose the orange and red. I used most of the shirt to make him some knit pants, and used the left-over scraps to make the tie.

Directions:
Start by tracing your tie pattern onto the back of some Heat'n Bond Lite or similar product. (You can find it at just about any sewing craft store, or even at Wal-Mart.)


Iron them securely with a hot iron according to directions on the Heat'n Bond. Cut out your pieces.

Peel the paper backing off the long tie piece, to reveal the adhesive.


Iron well and cut out your tie piece again. Now you should have a tie piece with two "right" or "front" sides.

Top-stitch around the edge of the tie, about 1/8 inch from the side. You don't need to topstitch the top, but it won't hurt it if you do.

You should end up with something that looks like this...

Peel the paper backing from the back of your knot piece. Place the knot and tie on your onesie so that they're centered and the tie is underneath the knot about 1/4 inch. You may need to curve the top of the knot slightly to make it fit the curve of the onesie hem.

Once you're happy with the placement, iron over the knot section well.

At this point, it will look like this...

Instead of back-stitching as I began and finished sewing, I left the threads long.

Then I pulled the threads through to the back (or you can use a needle to thread them through). Then I tied a several knots to secure the threads without making extra stitching show up on the front.


And you're done.


All ready to put on your own little guy.

My little guy is sure happy with his...and he's even happier that the weather is finally getting warm enough to sometimes play outside without a jacket.

If you're looking to give these as a gift, it can be tough to find comfortable black pants to match, especially for sweet newborns. The 2-year-old in these pictures is wearing traditional black pants, but for newborns and tiny ones, I prefer to make my own Comfy Newborn Cuffed Pants using a black or grey T-shirt for the fabric. (Yep, that's the same little guy as a newborn...although that was before I thought of making the ties floppy.)


Please show my sponsors some love...
Smitten Scattered Hearts in Pink - Quilt Sandwich Fabrics | Garden Tomb - Art Print from Prints of Peace | Anatomical Heart Pendant from Boutique Academia |
|
I'll be linking to:


And he just keeps getting cuter as he grows!
ReplyDeleteSuch a fun idea! Thanks for the tutorial :)
ReplyDelete