

The best part about these pillows is that my older kids can do most of the sewing themselves.
We live in a small town, and sometimes birthday invites come last minute. These pillows have saved us several trips to the store, and they've gotten lots of compliments.

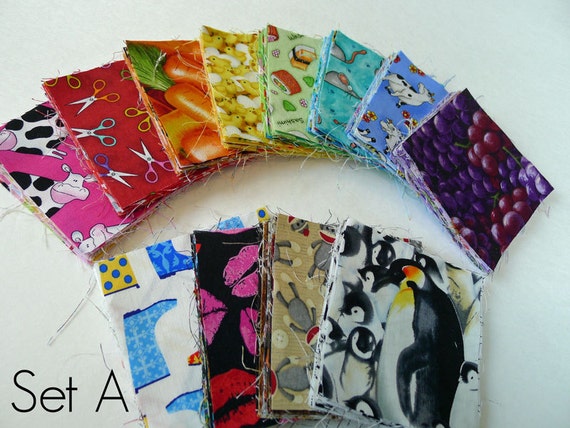
My kids love looking through all my I-Spy squares and choosing ones they think their friends will like. The best way to get lots of I-Spy squares is through a swap. Sometimes I have extra I-Spy Sets listed in my Etsy Shop. You can also check with your local quilt shop for charm packs.
This last time, I got smart and took the photos for a tutorial.
Skill Level: Basic Sewing Skills - Great beginners project
Materials:
- 16 - 4 inch I-spy Quilt Squares
- 15 in square of fabric for backing. I used Cuddle 3 from Shannon Fabrics in Dark Lime. You can also use regular quilting cotton.
- 20 ounce bag of Poly-Fil ®
- Thread
- Pins
- Sewing Machine
Time Needed: Less than 1 hour for an adult. It might take longer for a child.
Note about Sewing with Kids:
You'll need to use your best judgement about when to have your child start sewing. My three older kids (age 10, 8, and 6) are about equally good at sewing because my youngest has the longest attention span and most interest. The oldest has a shorter attention span and has a harder time finishing a tedious project. You really have to judge by your child's interest and attention span. Also be prepared that a child might not have the attention span to complete
Directions:
Have your child choose 16 squares and arrange them. Then TAKE A PICTURE, so you can remember the order later. The two pillows in these were made for two different boys who both love blue and green.
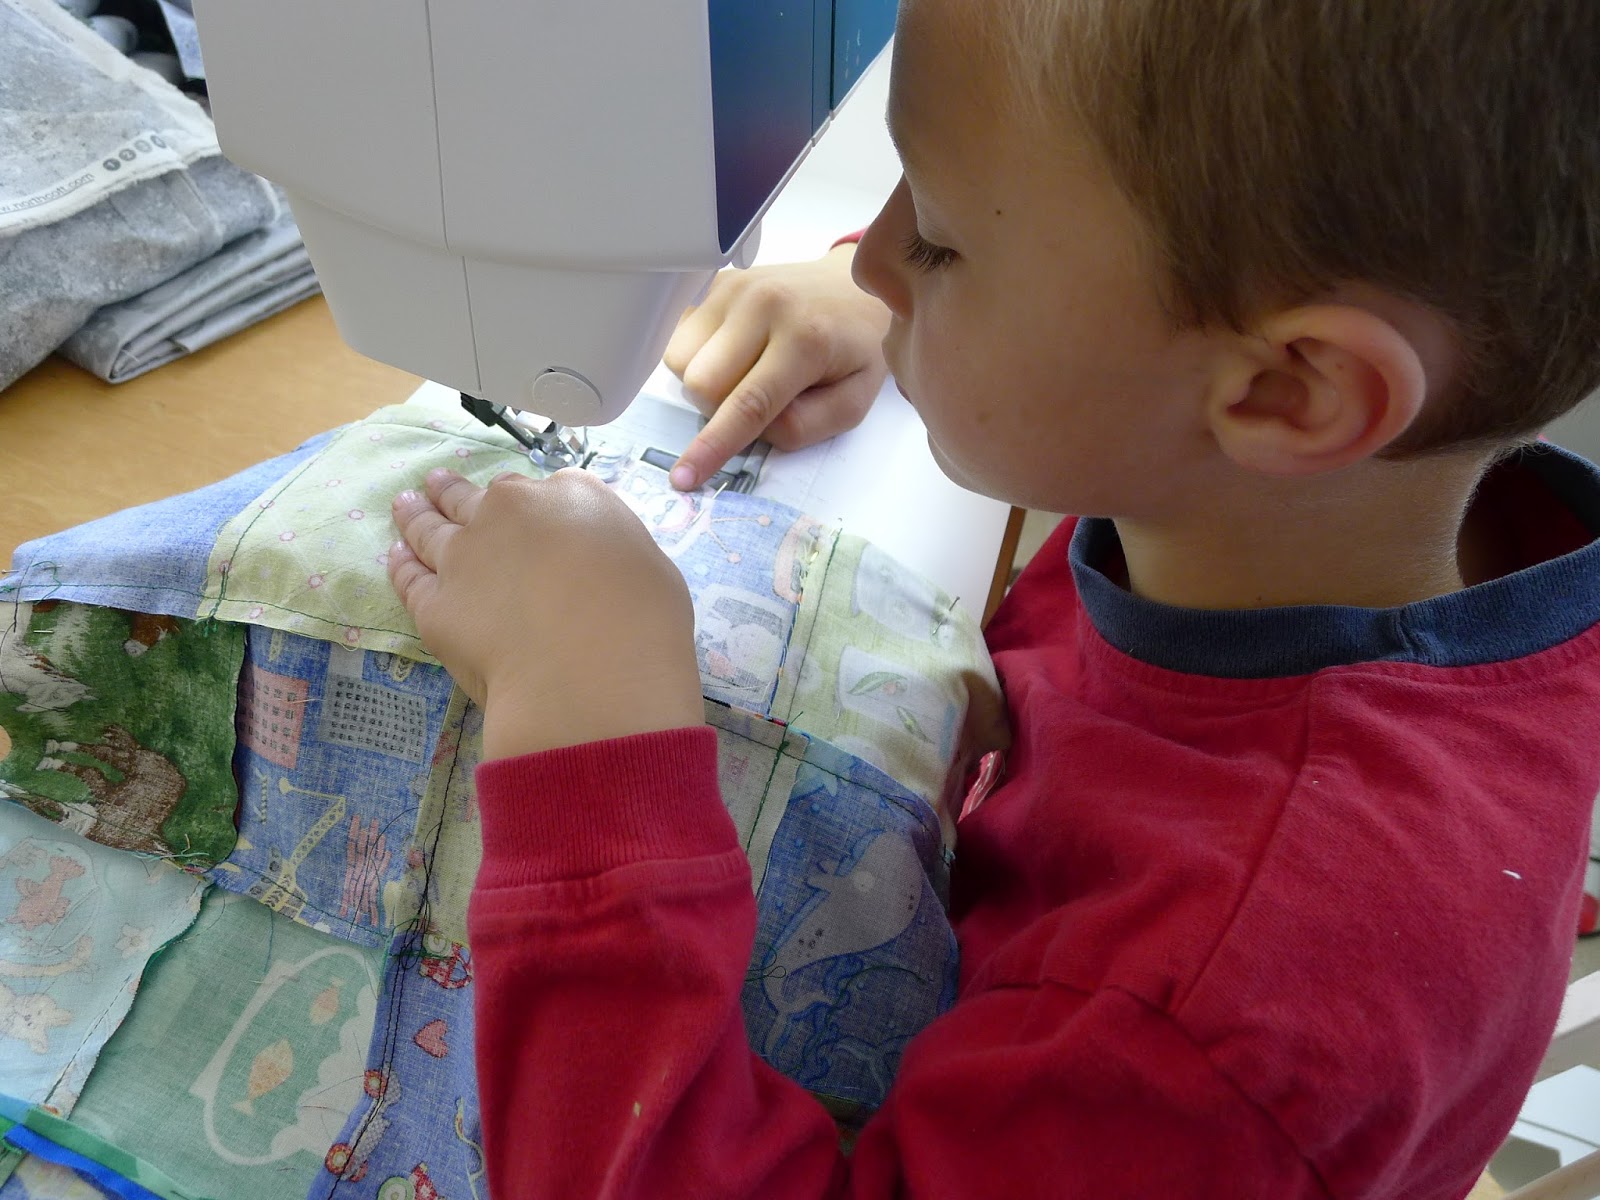
The real key to have your corners line up is to use consistent seam allowances and to pin the pieces so that the corners meet...SO, I pin all the pieces for my kids.

Then I have them stitch the pieces with 1/4 inch seam allowance. My needle can adjust side-to-side, so I move my needed, so that they can use the side of the presser foot as their guide.

You may need to remind them to backstitch at the beginning and end of each seam. I have them chain stitch the pieces one after another.

Have them remove the pins and cut the threads holding the pieces together.

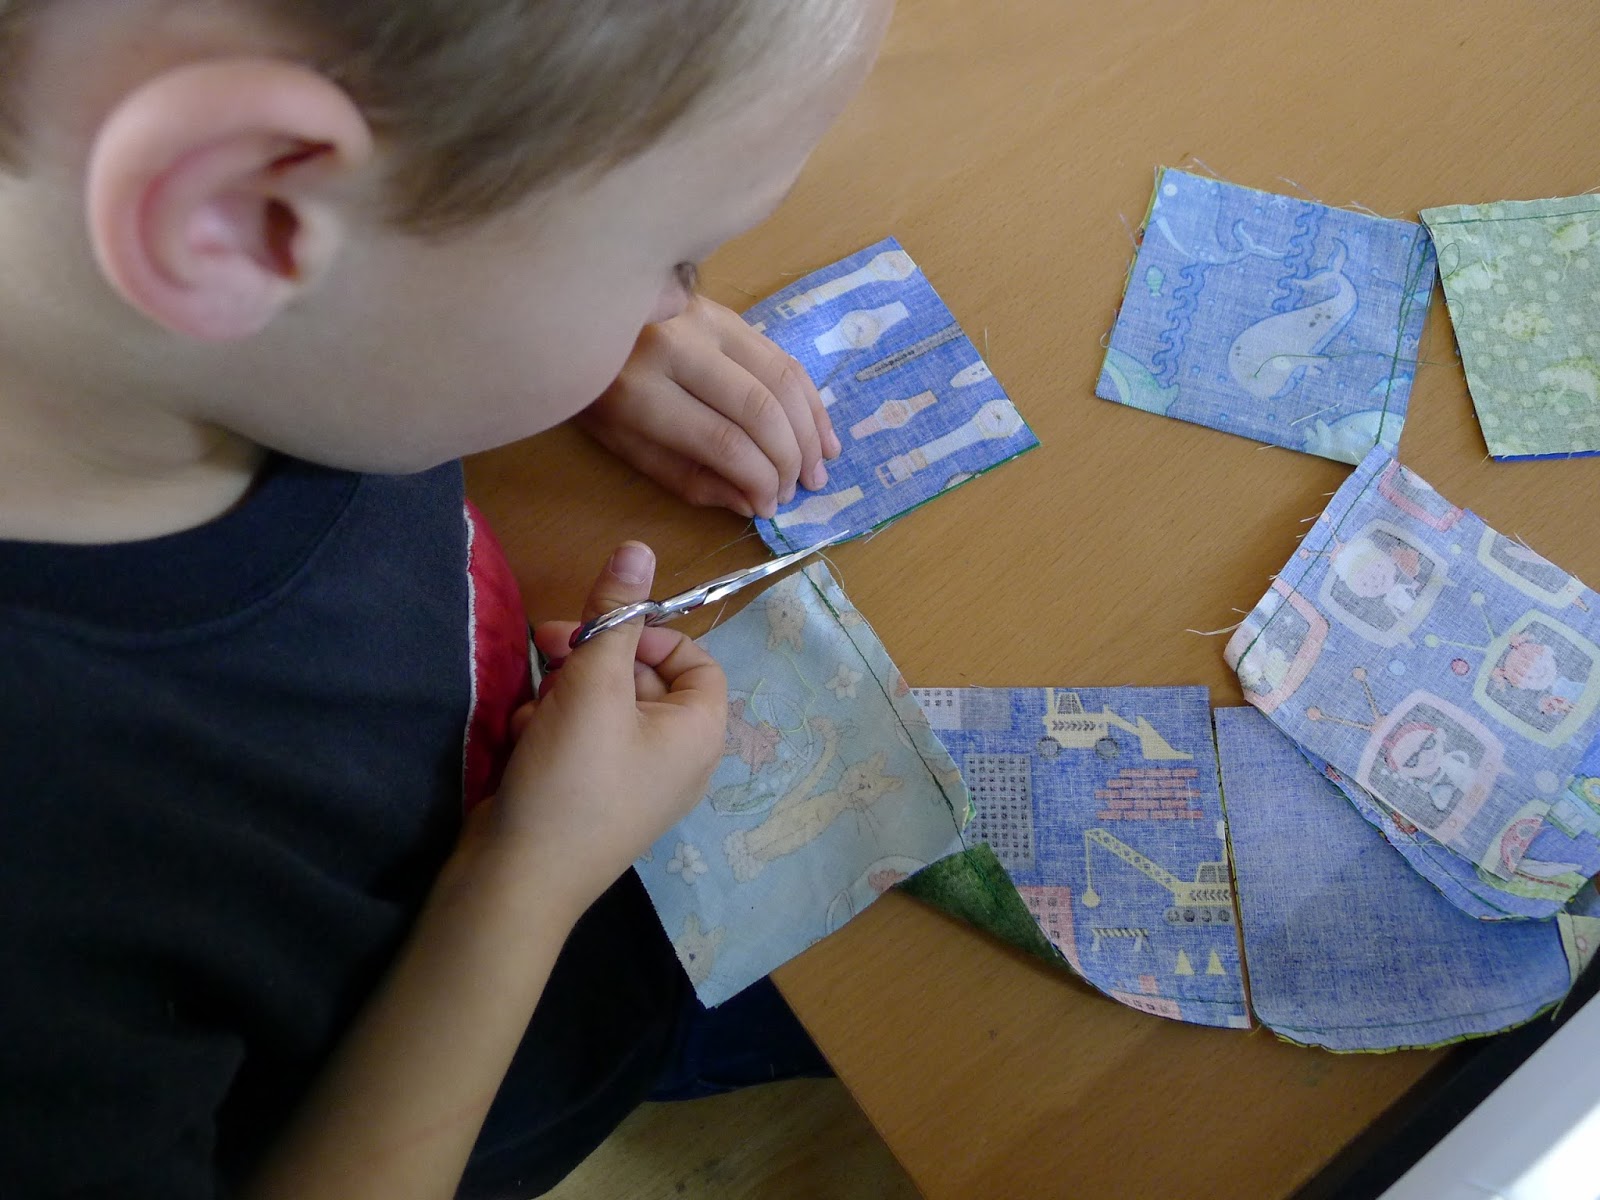
When I'm sewing, I usually iron the seams open, but my kids don't sew as straight, so I have them press their seams to the side.

Then I have refer to the picture you took to arrange their squares back into order.

Pin the squares for them again. It is likely that their seam allowances weren't perfect, which will result in the lengths varying...so...I line up the middle seam first and pin it. Then if the ends are a little uneven, I don't worry about it, because that will be hidden in the next seam allowance. I prefer to sew them into larger blocks than into a long strip, but that is just personal preference.

Have them repeat sewing, removing the pins and cutting their threads, and ironing


Rearrange the pieces.

And repeat until you've got all 16 squares sewn together.


Lay your top UPSIDE DOWN on your backing fabric. Make sure your backing fabric is FACING UP. Cut around backing fabric out around your block.

Pin well. Pin it REALLY well if you're going to have a child sew this.


When we sew, we're going to leave an opening to add our Poly*Fil. I like to put a double pin in the place where I want my child to stop sewing.

I like to mark each corner at the point where they should stop sewing and turn.

Have them sew around all four edges with a 1/2 inch seam allowance and leaving about a 4" opening for the Poly*Fil.
Iron the seam allowance back at the opening. This will help keep the edge straight when you sew your pillow shut later.

Trim the corners being careful not to cut the threads.

Turn right side out. A chopstick or pencil can be helpful making sure the corners get pushed out all the way.

Stuff with Poly*Fil. Help them really stuff the corners. Once you think it's full...it's usually a good idea to stuff it a bit more.

Sew the opening closed.

And it's ready to wrap.

And these pillows look just as great in pink or purple. (The pink and purple ones were sewed by me and include quilting as well, but that will have to wait for another tutorial.)


Please show my sponsors some love...


I love these smaller I-spy projects. Not so intimidating to me as a full-on quilt. Seth did a great job!
ReplyDeleteWhat a great idea that I think even my kids can do! Thank you for sharing! I can't wait to make this!
ReplyDeleteVery impressive sewing there! I made my daughter an I-spy quilt when she was 4 and she loved it.
ReplyDeleteI hope you can stop by:
http://collettaskitchensink.blogspot.com/2015/04/make-it-monday-stained-glass-granny_27.html
Colletta