

They also make great gifts for teacher and if you choose the right novelty fabric they can be personalized to anyone's taste. Disclaimer: Thanks as always to Fairfield World for providing the support foam and batting as well as compensating me for this project. All opinions, ideas, and enthusiasm are 100% my own. This post also contains affiliate links to help support my blog.

We also love to use these as Thank You gifts for our kids' teachers at the end of the year. A good zipper pouch is a universally appreciated gift if you choose the right fabric and colors.

And once you get the hang of them, they are SO fast and easy.

We love these Jumbo Sized Ones because they even fit the standard sized easy-reader books.

Supplies:
- 1/3 yard Novelty fabric for the Outside (100% Cotton Works Best)
- 1/3 yard Contrasting Novelty Fabric for the inside.
- 5/8 yard Support Foam Interfacing
- or a Double layer of Soft & Toasty™ Cotton Batting 36″ X 45″ can be substituted for foam
- 1 Contrasting Zipper 14" or longer.
- Contrasting Fabric Scraps to cover zipper ends
- Coordinating/contrasting threads.
- Basting Spray
Directions:
Cut 2 rectangles 10" x 15" from each of your two fabrics and your Support Foam Stabilizer.

If you want to add any addition embellishment such as no-sew hexies or buttons, now is the time to do it.

Use basting spray to adhere your outer fabric to the support foam.


Quilt each piece as desired to permanently attach the outer fabric to the foam. You can use regular stitching or decorative stitching. In this case I took advantage of the newspaper lines and added some color with a decorative stitch.

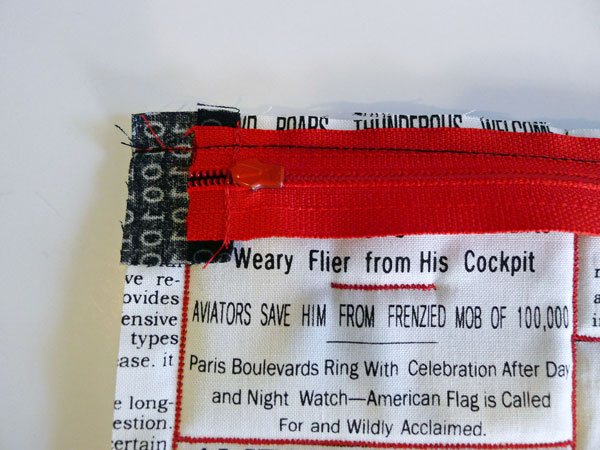
Stitch your fabric scraps to the ends of your zipper so that they are stitched 12" apart. The scraps should extend about 1/8 wider than the zipper one each side. The first should be just over the metal ends. I buy longer zippers in bulk and trim them down as needed.


Iron your zipper tags over and trim even with the sides of your bag.


With RIGHT SIDES together (zipper down against the outside fabric), line your zipper up, so that the zipper tags/scraps are even with the top edge of your bag and the zipper is about 1/8 inch away. Stitch with 1/4 to 3/8 " seam allowance, backstitching at the ends.

Repeat and with the other side of your bag.


At this point your bag should look like this if you open it. You'll want the zipper about half way open.


Take the inner edges of the bags. With the RIGHT SIDE of the inner fabric down, line it up with the outer side on the opposite side of the zipper like this. Stitch with the same seam allowance.


Turn around and repeat with the second inside piece.

Iron the inside and outside pieces open. top-stitch about 1/8 inch away from the zipper


It should look like this underneath.


To make a boxed bottom, fold each corner so that the bottom seam is lines up perfectly with the side seam, forming a triangle corner like this.

Stitch 1 1/2 inches away from the tip (as measured straight in along the matched seams).


Turn right side out.

You'll still have an opening in the inner bottom. You could hand stitch it closed so the stitching doesn't show...but I prefer to just machine sew it and have done. No on is going to check the inside stitching on your bag.


And now it's ready for you to enjoy!

If you're looking for a smaller, flatter zipper pouch, you can see my tutorial here:


These pouches could be used for so many things - the larger size is great. I like how you coordinated the fabrics for each teacher :)
ReplyDelete