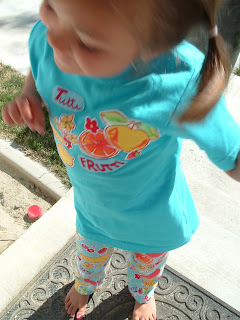
As you all know, I should be packing, but I've also been making up excuses for why I'm still doing craft stuff...like any new clothes for Firecracker to wear to school should be done BEFORE the move, because I'll be too busy after the move.
...and I bought a nightshirt at Goodwill that was just SCREAMING to be turned into some pants for Firecracker. (That's what I get for buying such a loud print.)
And there's something about clothes this fun and loud that make a girl want to jump around.
And for any of you who find some of the other ways to applique intimidating, I thought you might like this method because it doesn't take a pattern. Instead, I just used the print right from the extra fabric.
To do this, you need to cut out around your design, leaving some extra that we'll trim off later.
Arrange, your appliques on the plasticy side of some Heat'n Bond Lite or similar product.
Place a piece of paper over them, so you don't get your iron sticky, and iron. Once they were pretty well stuck, I also turned it over and ironed some more.
Then cut out your pieces to be just the size you want.
Then I pulled a T-shirt out of the stash. I have no idea where Clear Choice Health Plans came from, but I think it looks a lot better as Tutti Frutti, especially since this covers up a stain.Peel off the paper backing.
Arrange and iron onto your shirt.
Then stitch around the sides. I decided to follow the red lines in the print. You general want to stitch about 1/8 inch away from the edge. (Sorry about the weird dark pic.)
And as I've shared before, the secret to neat and tidy applique is that you don't sew back and forth at the beginning and end to secure the thread. Instead, leave the ends long, pull them all through to the back, and tie them in several square knots. Then I leave about 1/2 inch take after the knot to make them less likely to come undone.
Super easy and matches the pants. I made the pants using the same directions as my 25-Minute Shorts Tutorial.


Super cute Polly. I just might have to try this sometime. :)
ReplyDeleteLooks like kindergarten will be sooooo much fun!
ReplyDeleteI love this idea! Please drop by and link up to Vintage Suitcase Friday! I will have to spend some time looking at your clothing rehab ideas (found you on Remodelaholic). Also, I have been playing around with my pictures in Picasa and it's so easy to lighten up a dark picture like the "weird dark pic" here. Sometimes you can fix it by just clicking "I feel lucky". You could also ramp up the fill light a little and turn down the color temperature. I can't believe how easy it is to fix pics on there!
ReplyDelete:)
So fun!! Great idea!
ReplyDelete