
I told Hubby that for my birthday present I wanted a garage date to build these shelves. (And I promise a step-by-step is coming at the end of this post...I just can't help show you the finished pictures first.)

I'd been looking at a few options for kid-friendly bookshelves, and chose these because I love the way they look. What I've ended up loving most about them though, is that my pre-schooler and toddler can pick and put away their own books!! They can't reach the higher shelves, but that's turned out to be a nice way to rotate books, and they can always ask for help getting an out of reach book.
We did start with inspiration from Fawn at Frugal Home Designs and these from Texas Monkey. They're all variations of the same shelves, although the size wood each of us used is a little different as is the placing of the screws.

I'm already thinking of a few more places where we could use them.

We put four of them in Little Brother's room since he had the wall space. We set the lowest shelf aside for him...notice a theme in the kinds of books he likes?

And each of the girls got one by their beds.


Notice anything about Firecracker's favorites?
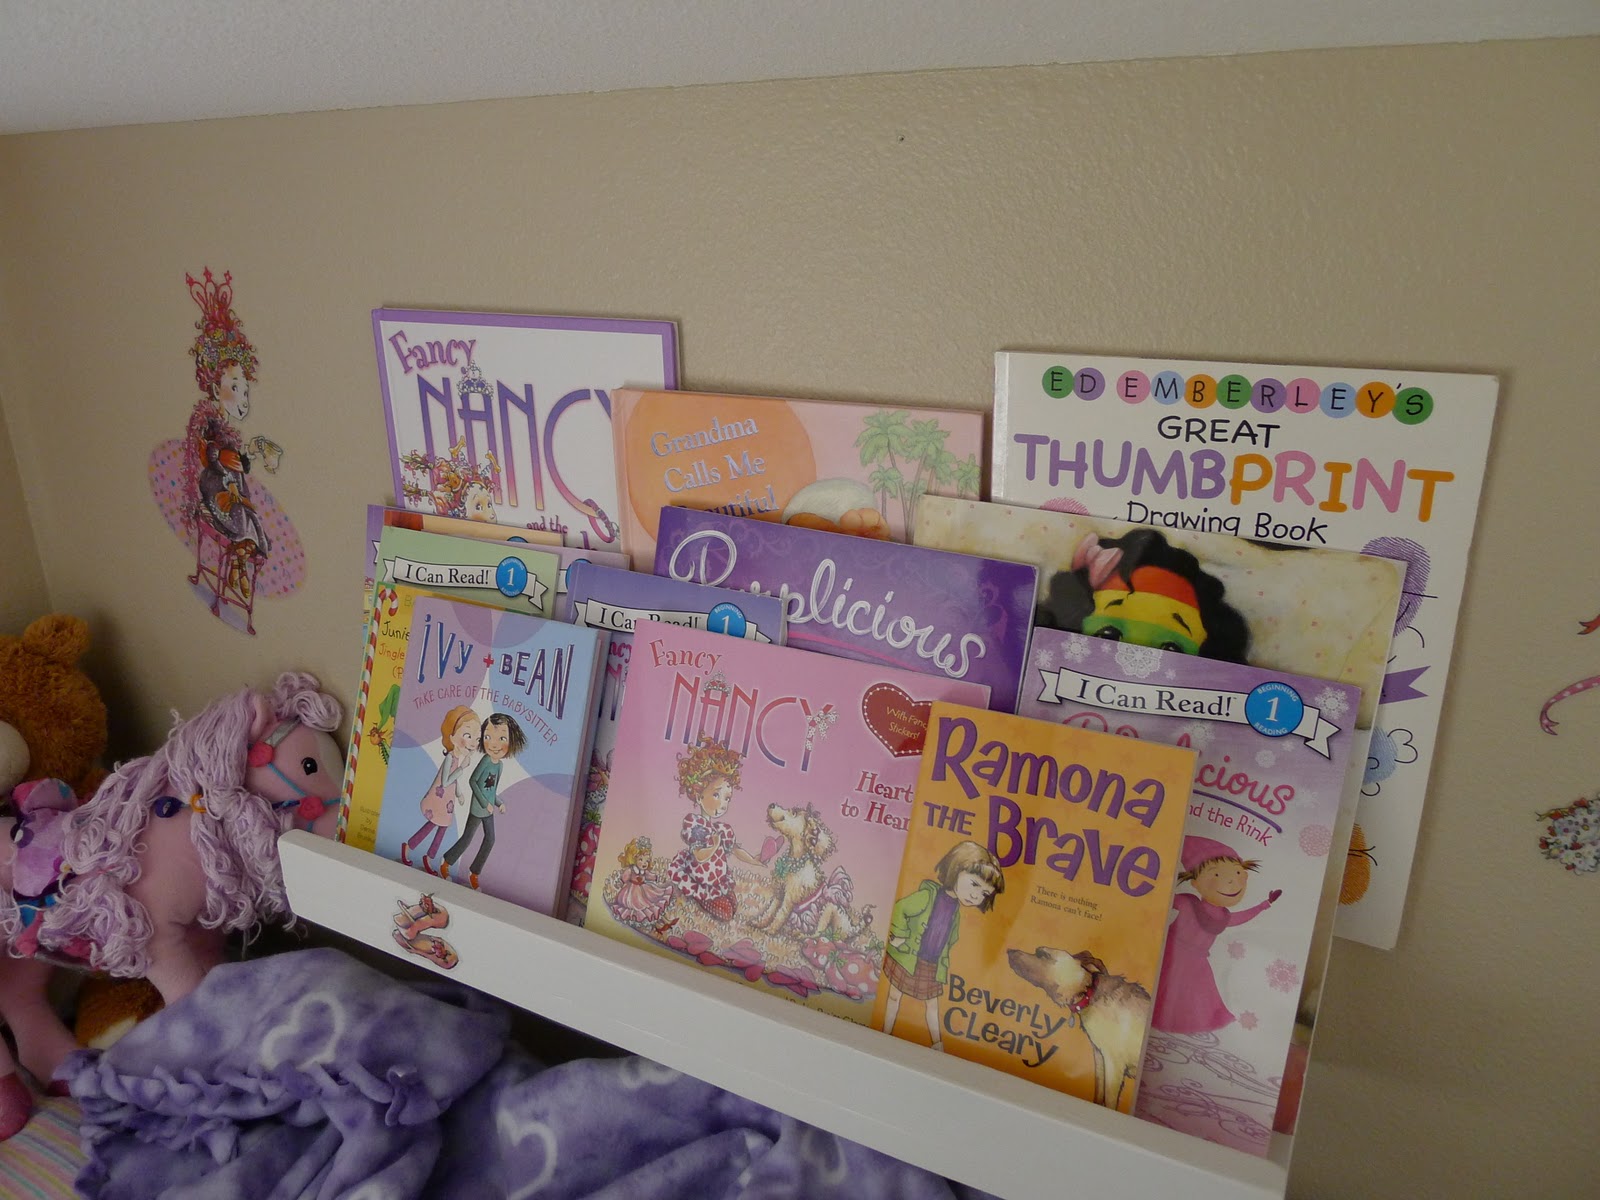
Firecracker also likes to use hers as a place to put a sippy of water or tissues she might need during the night.
A shelf by her bed, provides Sweet Pea a much larger supply of books to stack...

...and fill her crib with.

But what I love most about these shelves is when she's done, she can put them away by herself.

And she loves it.

The sweet print of Christ's hands and the little girl can be found here.

We made the shelves deep enough that they can hold several layers of books. Since they're this deep, they can hold almost as many books as a similar sized traditional bookshelf...but without the worries of them falling off.


And as you can see not all of the books on our shelves belong to us...some are library books.


So here's what you're all waiting for...the instructions.
Tutorial:
- (2) 1''x2''x8 foot board
- (2) 1''x4''x8 foot board
- (2) 1''x6''x8 foot board
- wood glue
- screws or nails--We used 1 1/4 inch screws (about 50) for assembling the shelves and 2 1/2 inch screws (about 15) for mounting the shelves to the wall through the studs)
- Sand paper and/or electric sander
- Paint or stain
- Wood filler/calk optional (We didn't use it, but to make them look more professional, you may want to.)
Each shelf will need a set that looks like this.


We started out by sanding the pieces with our little electric sander. Sand paper would look fine too, it will just take a little longer. I just sanded the edges that were going to be exposed.


As we constructed the shelves, we put down a layer of wood glue, and then the wood on top of it.

The way we did it, the front piece goes ON TOP of the bottom piece.
We were able to use clamps for the front piece, but for the others we just had to hold it in place ourselves while Hubby drilled holes for the screws and then put the screws in place. You'll want to wipe off any excess glue as soon as you've got the screws in. We did the lip on the front of the shelves first.


We didn't measure exactly where we were putting the screws because they don't show, but they were about an inch from each end and then a little less then 12 inches apart going down the shelf.
Then we repeated the process for adding the back of the shelves. We put the back piece BEHIND the bottom piece.
Then we repeated the process for adding the back of the shelves. We put the back piece BEHIND the bottom piece.


We had to hold the back pieces ourselves because we didn't have large enough clamps.


Once the screws were in, we took the clamps off and let the glue dry overnight.
One additional step that we skipped was to put wood filler in any defects in your wood and/or to cover the screws. You would need to do this and let it dry thoroughly before doing a final sanding. We didn't fell the wood filler was necessary because the way we constructed the shelves, the screws were on the bottom and the back and not noticable.
The next morning we sanded the shelves down thoroughly to even out places where the seams hadn't been lined up perfectly. (Hubby says he heard that the difference between a master woodworker and other woodworkers is that they know how to hide their mistakes...we're not masters yet, but we did a passable job.)


Then we applied one coat of primer and two coats of semi-gloss paint. We applied one coat and then had to let it dry for a day...our garage is pretty cold right now.

To mount the shelves to the wall, we used 2 1/2 inch screws and made sure they hit studs.

For other ideas for display shelves, you can see full wall rain-gutter shelves here.
I really LOVE how the rain gutter shelves worked in this bedroom at the Stories of A to Z, but we weren't going to be able to redo the whole room that way.
Please help me make blankets for kids in my community. I have mini-quilts available in my shop. All proceeds go to buy materials for local blanket programs.


They turned out great! I love how you put them on the wall by their beds!!
ReplyDeletePolly these shelves are SO awesome. I wish I'd thought to make these when you and your sibs were growing up!
ReplyDeleteLove this! Thanks for the tutorial!
ReplyDeleteAngel
www.etownhooks.blogspot.com
By the way, how did you get the reaction info at the bottom of your post and make the linky buttons so small? That is really neat!
ReplyDeleteangelinahook (at) hotmail (dot) com
Awesome. :) I love the way it looks--like a library for little people. Someday, when I have a REAL home, I will ask for a similar date with my hubby. :) Good job guys!
ReplyDeleteJaime
I recently found your blog and I love it, I have awarded you the Stylish Blogger Award! Check it out at itsalwayscrafttime.blogspot.com. You definitely deserve it!!
ReplyDeleteOh my goodness! I love your picture tutorial! My 2 & 3 year olds need one of these and would love it! Thank you for posting this!
ReplyDeleteThese are awesome. I would love to have some of these in our home.
ReplyDeleteComing over from Get Your Craft On. Your bookshelves are amazing!!! Maybe I can convince my hubby to have a garage date too! Thanks for sharing!
ReplyDeleteI am in the midst of making something similar right now for my youngest, but I think that I will copy yours for my older son. I think I might also make some for our hallway. I truly believe that one can NEVER have too many shelves.
ReplyDeleteI think these shelves are such a great idea. DO you find your children want to read more, now that their favorites are always visible?
ReplyDeleteTHANK YOU for this tutorial! :) I can't wait to make these for my boys!
ReplyDeleteWow! Great tutorial! Can't wait until we move so I can do this for my daughter's "big girl" room.
ReplyDeleteFor Real these are AWESOME!!!! Thanks so much for sharing!
ReplyDeleteI would LOVE to say I am going to make these TOMORROW but ... lets be real probably wont make the list for a year!
ReplyDeleteWhat a fantastic idea! I love it!
ReplyDeleteLOVE!! So simple, but perfect for kids.
ReplyDeleteturned out great! helps to have a handy husband!
ReplyDeletecheck out the giveaways I am having on my site.
A chance to win a fairy silhoutte tee from Elizabeth Horton.sizes(18M-8y)
http://houseonashwelllane.blogspot.com/2011/02/whimsical-fairy-silhouette-t-shirt.html
$15 store credit to select any hairband and clips from LiaGeneFab11
I love the idea! I would love to get some of our bookshelves off the floor. And love that you put them by the bed, too.
ReplyDeleteOh my golly gosh!!!! You read my mind. I have been looking and trying to find some shelves for my little girl, and nothing has caught my attention. I was just scrolling through my Favorite blogs ( to see whats up and new, and to read later) I saw your shelf pictures on Ucreate, and I had to stop, and read, and I got all excited, even called my Hubby to see your post. I want to do this as soon as possible... now just have to get the supplies, and when he has some available time, we will be doing this. Thanks so much for sharing. Cant wait!!!!
ReplyDeleteFabulous way to display books and get kids reading more. Thanks for sharing how you did it.
ReplyDeletethese are awesome!! I would like some of these shelves in my room!! I am actually going to feature it, so go by and grab a badge :)
ReplyDeleteAnd.... thanks so much for linking up to Handmade Tuesdays @ Ladybug Blessings and make sure to come enter my giveaway for Handstamped Silver :)
Amazing! I love this!
ReplyDeleteI love this. Would be perfect for my daughter's room for all her books! And it looks super easy!
ReplyDeleteThese are so cool!! I love the idea of having their own little library by their beds! My youngest loves to cuddle with a book every night and has a stack of books in her crib. She needs this shelf! Thanks for sharing how you did it.
ReplyDeleteI love these shelves! Thanks for the tutorial. My sons room needs these.
ReplyDeleteWe just spent the afternoon discussing shelves in my girls room. I showed them to my husband and this might be our answer! Thanks, stop by sometime, domesticdeadline.blogspot.com
ReplyDeleteThis looks so great!! I featured you on my site today :) http://youseriouslymadethat.blogspot.com/2011/02/sunday-feature.html
ReplyDeleteI keep seeing the rain gutter shelves but was afraid they would be too flimsy... this is exactly what we need!
ReplyDeleteThanks for the tute!
I LOVE these ... and love that you said, "If WE can do it, YOU can do it!" b/c my first thought was, "I could never do that!" ;-)
ReplyDeleteYour tutorial is great, though...might be our next date night, too! :) THANKS!
I just emailed these to my husband to see if he'd get inspired to make them for me lol Love your site and am a new follower and fb fan.
ReplyDeletehttp://livingatthewhiteheadszoo.blogspot.com
Fantabulous!! My girls just got bunk beds and would love a shelf of their own by each one. Thanks for all the instructions too. When I get around to making them, I'll totally come back to share!
ReplyDeleteI finished mine--come check it out!
ReplyDeletehttp://craftingintherain.blogspot.com/2011/03/kids-bookshelves.html
Hi, finally finished my shelves and posted them on the blog. Thanks for the great how to. Here's a link if you want to see them.
ReplyDeleteAmber
http://livingatthewhiteheadszoo.blogspot.com/2011/04/front-facing-picture-book-shelves.html
Love the shelves...but please tell me those aren't your poor children's real names....
ReplyDeleteThank you so much for this! I had my dad make some for my daughter's room!
ReplyDeletehttp://gabrielsgoodtidings.blogspot.com/2011/06/last-time-we-were-visiting-my-parents-i.html
Following you from tatertots and jello-stop by for a visit!!
ReplyDeleteThank you so much for this! I did a google search and there you where! Made our Sunday Project so super fun an stress free!!
ReplyDeleteTHANK YOU ^_^ WE made one and it was soo easy and looks great !!
ReplyDeleteThese are SOOOOO great!
ReplyDeleteJust was looking for ideas for my school classroom for facing books so the covers show. This seems like a great option.
ReplyDelete