

I have to confess, I spent most of my sewing time this weekend exploring my sister's new book with my kiddos. Simple Sewing: 30 Fast and Easy Projects for Beginners by Katie Lewis (affiliate link). Be sure to check out her book tour starting today on her blog The Red Kitchen for lots of project inspiration and chances to win your own copy...and her blog tour will be coming here on Friday, so I can show you what we've been working on.
Anyway, let's get started! Today's lesson is going to cover cutting and sewing your greens together. If you're just joining us, be sure to check out our first lesson on Fabric Selection and requirements here. Then our next lesson (which will hopefully be ready by Saturday) will focus on cutting out our green and white triangles.

If you need to review our previous lessons, you can find them here:
Lesson 1 - Fabric Selection | Lesson 2 - Sewing Your Greens
 | Lesson 3 - Cutting Your Triangles |
Lesson 4 - Basic Applique  | Lesson 5 - Sewing Your Triangles  | Lesson 6 - Advanced Machine Applique  |
Cutting Tools
You'll definitely want a rotary cutter, ruler, and cutting mat. If you don't have these supplies, then ask around and see if you can borrow them from a friend. (And by the time you're finished with your quilt, you'll be in love with quilting and will want to buy your own.) They can be kinda spendy...so when/if you do go buy these supplies be sure you're doing it during a good sale or with a coupon.

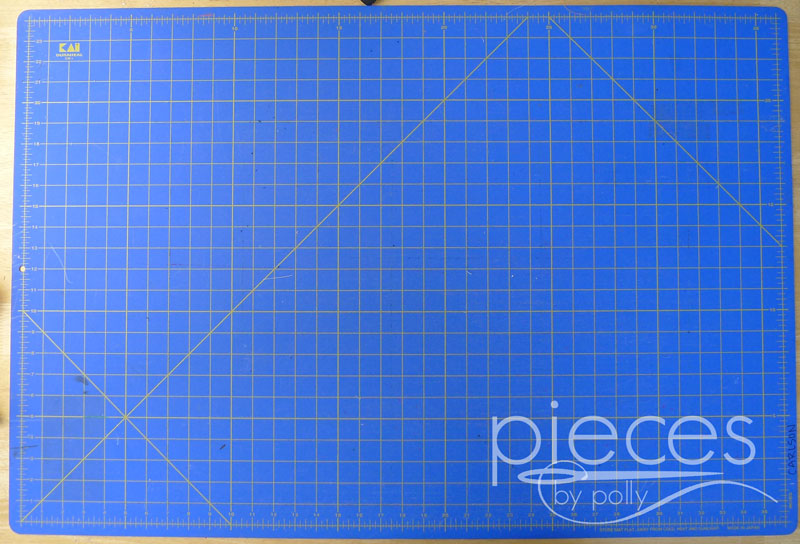
My cutting mat is really big. I've gradually worked up in size over the years. If you can get one that is at least 24 inches wide in one direction, it will make things easier for you because then you can fold your fabric in half and cut across the whole width of it. My cutting mat is 36x24 which is a little bigger than necessary. If you're working with a smaller cutting mat, you'll just have to move your fabric over as you cut.
I also have several different sizes of rulers, which come in handy for different things. If I could only keep just one ruler though, I'd keep my 6x24'' ruler. It's long enough that when I fold my 44'' wide fabric in half, I can cut it all the way across...and cutting out my quilts by cutting whole strips is my favorite way to cut. If your mat and/or ruler are not wide enough for that, though, you can manage by cutting as much as you can, moving your fabric over, lining it up again, and then cutting a bit more. It's also nice if your ruler has degree markings. Don't worry if your's doesn't have them though...we'll be making our own degree markings this time anyway.

How Many to Cut
Before you start cutting, you'll want to print off the cutting chart. Because we're working with so many different fabrics and widths of strips, it's helpful to have a list to check off. I checked mine off in my little quilting notes journal...but I've made up a nicer version for you. You can download and print the cutting chart here.
If you're making a full version of the quilt, you'll need to cut four sets of strips to make four large green pieces. If you're making a table runner, you'll just need to cut one set of strips...and don't worry...the trees will still look different since half of them are cut out "upside-down."
Cutting Your Fabric
You're going to start by folding your fabric in half, so that the selvage edges are together. If you chose not to pre-wash your fabrics, then they may already be folded this way.

Even if your fabric is straight out of the bag from the fabric store, though, the cut edges may be a little crooked and/or frayed if the clerk didn't cut it straight, so we're going to start off by trimming and squaring the edge. I always square my edges with the center fold, so that when I unfold the pieces, they will be straight.

Line up any line near the end of your ruler with the center fold and adjust the ruler so that you can trim off the frayed/crooked edge without trimming off extra fabric.

Press on your ruler firmly, so the ruler won't slip and trim off the raw edge.

Now we'll start cutting out our strips. The widths I chose for them vary from 1 1/2 inches up to 3 inches. (This picture shows measuring a 3 inch strip.) Just like we did when trimming our fabric, we'll choose a line near the end of our ruler to line up with the center fold, and measure the width of our fabric.

This picture is measuring a 2 1/2 inch strip.


We lose 1/2 in of that width to the seam allowances. You could cut all your 2 inch strips from one fabric and all your 3 inch strips from another fabric...but I wanted the overall quilt to look scrappy and random, so I cut out a variety of strip widths from each fabric. So from one fabric, I would cut out one 3 inch strip, one 2 1/2 inch strip, one 1 1/2 inch strip etc. Sometimes I repeated, sometimes I didn't cut one of the widths.
 I just kept going until I had cut 3 or 4 strips out of each fabric, and moved onto the next fabric, until I'd cut all the strips I needed.
You'll also want to lay your strips out in an organized way...because believe me, it's easy to get yourself confused about which pile is which. (I have 5 piles here because I'm making a quilt and a table runner.)

If you're using fat quarters or smaller cuts/scraps of fabric that don't extend the entire 44 inch width of fabric, you'll basically cut out more strips and just sew them together end to end until the strip is 42-44 inches long. With most prints, the seams really won't be very noticeable in the finished quilt.


Sewing Your Strips
Now we'll work with one set of strips at a time. Lay them out until you're pleased with the order. I tried to vary the order from set to set. For instance, if the lightest fabric was on the edge in one set, I tried to put it in the middle in another and put it the second one in in the next. Also, note that when we cut out our trees...the top and bottom positions end up being switched on every other tree...so top and bottom are really the same position.

Now we're going to sew our strips together with a scant 1/4 inch seam. It's actually fairly common to accidentally make our seams too wide...so I've actually included a little bit of wiggle room. Once each set is sewn together, you should end up with a large green strip 11 inches wide and we need it to be 10 1/2. If you're concerned that this isn't enough wiggle room for you, you can either cut one strip in each set a little wider, or add an extra strip to each set. For me to sew 1/4 inch seam on my machine, I actually have to line it up with a point slightly to the inside of my presser foot. So if you're using the edge of your presser foot as your guide, you may need to add some width to one of your strips.


Once all the strips in each set are sewn together, you'll want to press them. I just pressed all my seams one direction...and it really doesn't matter which direction...because as we said...the top and bottom end up being the same.


Now we're almost done! Your finished strip should be somewhere between 10 1/2 and 11 inches. We want them to be 10 1/2 inches, so we'll need to trim them up. I started out by measuring the actual width...mine ended up being about 10 3/4. This gives me an idea of how much I'm going to be trimming, because you don't want to accidentally trim off too much.

You'll start by folding your strip in half, lining the edges and seams up as much as you can.
Just like when we were trimming and cutting our single strips, we're going to start by evening out one edge of our strip...or if you already feel like that edge is even, you can skip down to the next part. I squared the ruler with the center fold.


Once you've trimmed one edge, line that up with one of the horizontal lines on the cutting mat. Now you're going to count up the lines to 10 1/2 inches. We're going to line the 1/2 inch mark on our ruler up with the 10 inch line on our cutting mat.


And once you've got your strips trimmed up, you're ready for our next lesson which will be cutting this into triangles as well as cutting out our white triangles. I'm hoping to have that lesson done by Saturday.
Please show my sponsors some love...
Reindeer - Holiday Frost from You Keep Me in Stitches | Aspen Frost from Sisters and Quilters  | Architextures Topography in Navy from Quilt Sandwich | Ink Spots from Quilt Sandwich  |

Polly, You did such a great job on these directions. I think your photos and detailing will make this so understandable. I look forward to starting right away.
ReplyDeleteGreat tutorial,Polly!Thanks
ReplyDeleteI love the little chart! Do we only need 4 strip sets? I ask because in one of the photos you have 5 piles of strips. I wondered if that was piles organized by width, but there are only 4 different widths as well -- ?
ReplyDeleteOh, I think I got it: you are making BOTH the quilt and the table runner, so we see them both! Quilt = 4 sets, runner = 1 set, = 5 sets, yes?
ReplyDeleteYay! Excited to get started. Sadly, it will probably be Friday before I get a chance to work on it.
ReplyDeleteThanks for these wonderful quilt tutorials! I really love my Hexies by Halves quilt and can't wait to do another! In the first lesson, you mention the option of adding another row of trees to make the quilt wider (so I guess this is a vertical row). Would one more strip set be enough to do that? Thanks again!
ReplyDeleteI am now suffering from a severe case of cutting mat envy. Yours is so big! Ugh. Someday when I have enough space for a bigger one I am totally going to upgrade.
ReplyDeleteGreat tutorial! Thanks for linking up :)
ReplyDelete