
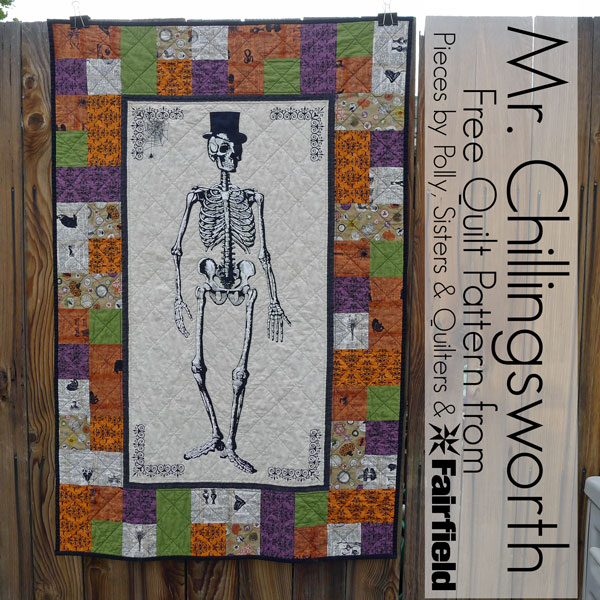
And isn't Mr. Chillingsworth dapper?!? I'm not into super creepy Halloween...but I thought this guy struck a good balance between being grown-up, but not scary. He's sophisticated and not disturbing.


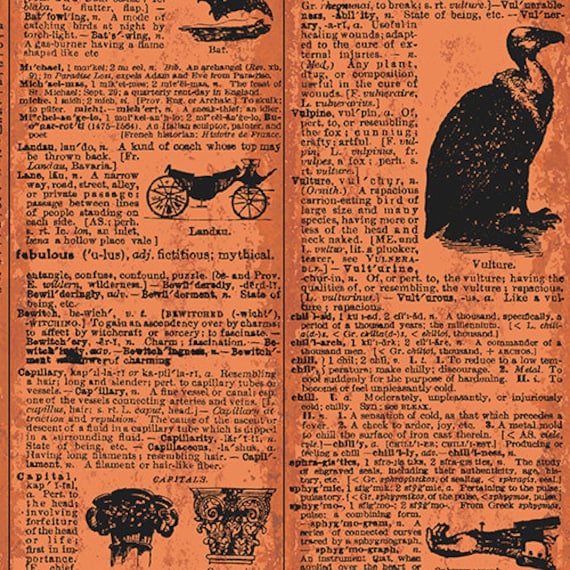
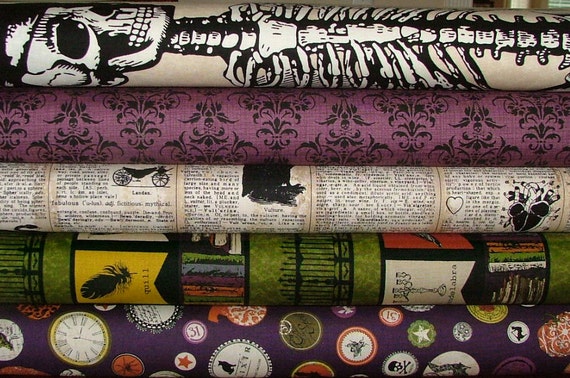
I love the texty and damask prints that come as part of the Mr. Chillingsworth collection too.


I planned to use s coordinating solid for the backing, but then I found this fun glow-in-the-dark skeleton fabric at my local quilt shop that just seamed perfect.

I actually didn't even know at the time that it was glow-in-the dark. I just loved how it had all the bones labeled. It seemed to go really well with Mr. Chillingsworth and all the texty prints on the front.

And one of the best parts about this quilt is on it's inside. I tried using some new batting this time (I usually use 100% cotton) and tried a bamboo/cotton blend. Let me tell you...this stuff is dreamy. It's so soft right of the bag that it almost seemed a shame to put it inside a quilt. I did put it inside the quilt though...and it really does feel different. The finished quilt is more flexible and drapes beautifully. It instantly has more of the feel of a well loved quilt rather than a slightly stiff new one. I'm going to have to get my hands on some more.

I'd like to thank Fairfield and Sisters and Quilters for helping me bring you this pattern. Sisters and Quilters provided me with the too-cool Chillingsworth fabric and Fairfield provided me with the dreamy batting, but all opinions and ideas in this post are my own.
And I've typed up the instructions, so you can make your own. As I've been working on the quilt and posting pics to Instagram, I've had several people ask me about the pattern...and you're in luck because I took pictures so you can make your own.
Materials:
- 1 Mr. Chillingsworth Quilt Kit from Sisters and Quilters (includes 1 Mr. Chillingsworth panel, 6 quarter yard prints from the Chillingsworth collection, 1 quarter yard of green fabric, and 1/3 yard of black for the binding.)
- 1 2/3 yards of fabric for the backing. (I used 1 1/2 yards and added an accent strip.)
- 1 crib sized package (45"x60") of Luxury Blend American Spirit quilt batting (50% Rayon from Bamboo and 50% Cotton)
- Rotary Cutter and Mat
- Sewing Machine and typical sewing supplies

Instructions:
ALL SEWING in this pattern is done with 1/4 inch seam.
Do NOT prewash your fabric. (Otherwise your quarter yard cuts will fray and you won't have enough fabric.
We'll start by trimming our panel. We need a center panel that measures 24 1/2 inches by 44 1/2 inches. The Mr. Chillingsworth panel isn't quite that big, so we'll add the black border. To get ready for the black border we need to trim our panel to make sure it's just the right size.
Cut 4 strips out of the black Chillingsworth damask fabric that are each 1 1/4 inches wide.


Now we need to trim down Mr. Chillingsworth a bit. To be ready for his black borders, he needs to be trimmed to 23 inches wide by 43 inches tall. For me the easiest way to do the trimming was to carefully fold the panels into halves, matching the corners of the design carefully.


Iron the seams. Trim extra off the ends.


Now we're ready to start making our boarder blocks. Take your 1/4 yard cuts and cut each of them into two strips that are 4 1/2 inches wide.


Take one strip of each fabric and match them into three coordinating pairs. (I made sure none of the pairs used the same base color.

Stitch your pairs together the whole length of the strip using 1/4 inch seam.

Iron your seams open.

Now we're going to cut our strips into smaller pieces 4 1/2 inches wide. We'll call this a double square piece.


You should have six strips left that are each 4 1/2 inches wide. We're going to cut these into rectangles that are 8 1/2 inches long.

Now we've got stacks of the rectangles and stacks of double square pieces.

Next we pair each rectangle up with a double square piece. I tried to mix and match them up, so that I ended up with a lot of different color and pattern combinations. You will need to SAVE TWO half blocks (either rectangle or double square pieces) aside.


Next we lay our blocks around Mr. Chillingsworth. I did my best to keep the fabrics as evenly distributed as I could. I didn't worry too much if some of the prints ended up sideways or upside down. It will take 5 blocks plus 1 half block (either a rectangle or double square piece.) for each side. The half block can go in anywhere between the blocks. Then we need 5 blocks across the top and bottom. You will have a few extra blocks.

Sew the side blocks together and the top and bottom blocks together.

Once your quilt top is finished, you'll need to get your backing ready. The quilt is narrow enough that you can use a single piece of fabric for the back. I bought my backing before I'd really planned out my quilt and it ended up being just a bit short...which was fine since I usually add accent strips to my quilts. You should have enough extra blocks that you could use them to make an accent strip, but I wanted to save them for a throw pillow. I had about 4 extra inches of the black damask fabric, plus I'd been given generous cuts of the texty prints, so I had a few extra inches of those.


And now you should be ready to baste, quilt, and bind up your quilt. I used American Spirit Luxury Blend Batting (50% Cotton and 50% rayon from bamboo) for the first time in this quilt and I have to say I'm in love. It's amazingly soft and the finished quilt doesn't have any of the "tightness" that most new quilts have before they've been used and washed for a while. It's makes the quilt feel like an instant friend.
I had a hard time deciding how to do the quilting. I ended up using black thread to go around the black border and to quilt X's through each of the squares in the boarder. I didn't want the quilting to distract from the skeleton, so I used cream quilting thread to stitch around the border. Then I quilted just outside of the skeleton. Then I finished up by "extending" the quilting lines from the border squares through the center panel, but stopped at the edge of the skeleton, so they didn't go through.

And that had the side benefit of being able to see the outline of the skeleton if you look closely on the back.


Please show my sponsors some love...


I'll be linking to:


What was your finished quilt size?
ReplyDeleteapproximately 40 x 56 inches
Delete