
The American Girl doll craze started at our house a little over a year ago when my younger daughter saved up enough money to buy her own American Girl doll with money she saved up. (She chose Grace because Grace looked the most like her of all the dolls that came with stories. We also have several of the similar and much less expensive Our Generation dolls.) Since then Becca's been in love with all things baking and Paris. It's been fun for me help her make her own accessories and clothes. (Something about miniature crafting is a bit addicting.)
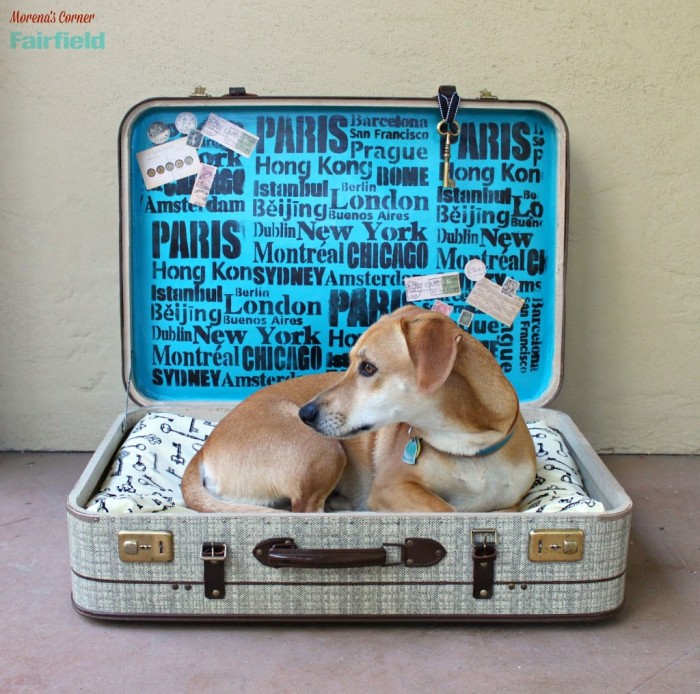
Ever since seeing this fun vintage suitcase to dog bed conversion from Morena's Corner, I've been trying to find just the right suitcase to do the same thing for a doll. (Since Becca's favorite doll playmates are her cousins who live three hours away, I wanted some way easily keep all her stuff together when we go on trips to see family.)

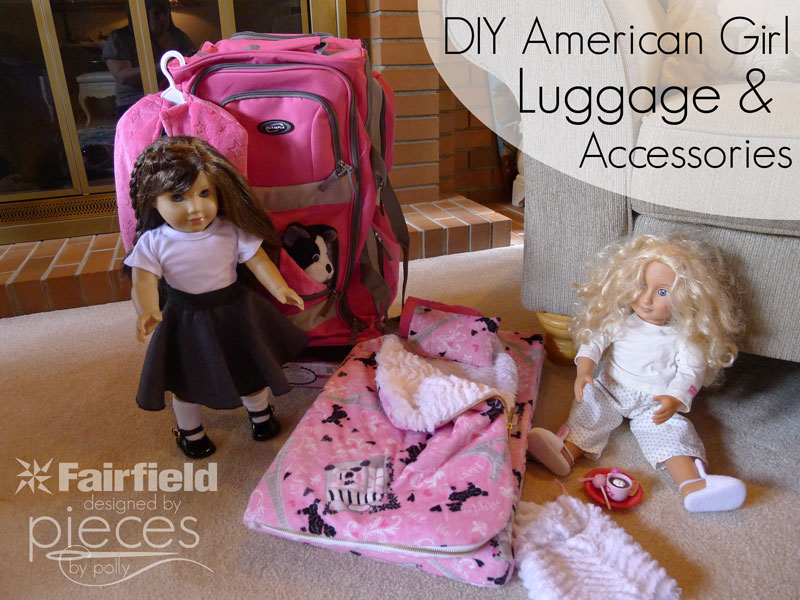
I must be shopping at the wrong thrift stores, though, because every vintage suitcase I was able to find was truly hideous...totally beyond the realm of ever being something a little girl could be excited about. Finally I went looking on Amazon to see if I could find just a cheap suitcase that would work...and I hit jackpot when I found this Olympia 22" 8 Pocket Rolling Duffel Bag (It was $24 at the time. The price seems to have gone up.) I was seriously so excited when it came and I realized it was perfect in every way....perfect pocket for turning into a peek-a-boo hole, lots of side pockets for doll goodies, and plenty of room for my daughter's clothes plus her dolls, so she can pack one suitcase for the trip and be set. It was so perfect, I sat right down at my computer and ordered a second one for my niece (her doll travels back and forth between mom and dad's houses.)...Because the only thing more fun than making something fun for a doll is making two. I'm not a connoisseur of fine luggage, but the quality of these is really pretty good. (At least as good as the other luggage our family owns.) Okay enough about the suitcase (and no I haven't been paid to advertise these...I bought them myself and just love them.) I'm sure there are other similar suitcases out there that would work great. I would say the one feature you'll really want to look for in a suitcase is that Peek-a-boo pocket located in the right place for the doll to peek out.

And for comparison's sake, ready-made doll carrying bags cost about twice as much, usually only carry one doll, and don't have a place for the big girl's things in the same piece of luggage.

Materials:
- 1 Suitcase, Duffle Bag, or Vintage Luggage to convert. We love the Olympia Luggage 22" 8 Pocket Rolling Duffel Bag from Amazon.
- 2" Cushion or Project Foam from Fairfield. I used cushion foam.
- 1 yard Cuddle Fabric to use as your main fabric. (We chose Paris Cuddle® Hot Pink for our pink suitcase and Bubble Dot Cuddle® in Lilac/Hot Pink for our purple suitcase.
- up to 1/2 yards of 1-2 coordinating Cuddle Fabric to use for accents. We used Ziggy Soft Cuddle® Snow and Embossed Star Cuddle® Fuchsia to go with our Pink and Embossed Heart Cuddle® Lilac and Lattice Soft Cuddle® Jewel to go with our Purple.
- 1 yard 1" Nylon Webbing (for two-doll suitcase). We used Polypro Belting Light Pink for both projects.
- Half Ball Cover Buttons Size 75 by Dritz (other similarly large covered buttons are fine depending on the size your store carries)
- 1-2 fun fashion buckles (depending on if you're making this for one or two dolls.) We used the Heart-shaped Fashion Buckle from Dritz to match the purple heart embossed cuddle in the purple suitcase and black Tab Closures with Snaps by Dritz for the pink suitcase.
- 1 yard - 1/8" ribbon or strong thread/cord for securing covered buttons
- Doll hangers (optional, but fun.)
- Template for Pocket Backs (if you're using the same suitcase.)
Supplies:
- Glue gun and glue sticks (I like this 2 Temp glue gun from Adtech.)
- Sewing scissors
- Rotary cutting mat and cutter (optional)
- Large-eyed needle for threading your ribbon.
- Electric carving knife or bread knife for cutting your foam (or have the store cut it for you.)
- Small serrated knife for cutting slits in foam.
- Hand-held vacuum or vacuum with hose handy. (Optional, but oh so helpful keeping the cuddle fuzz under control.
Making the Peek-a-Boo Pocket
This gives the doll(s) a place to peek out from when unzipped, and when zipped protects her face during travel.

Start by cutting out the backing fabric. In the suitcase we chose this was some kind of light weight fabric (I'm guessing nylon) which was NOT prone to fraying.

Use some scratch paper to make a pattern for the size and shape of the opening flap of the pocket. (If you're using the same suitcase, you can use my template for this piece here.)

Cut out a piece of cuddle to match exactly as possible. Since we're using cuddle fabric once the initial cuddle fuzz comes off, it won't fray so we don't need to worry about raw edges.

Use hot glue to around the edges of the flap to hold the cuddle fabric in place. Start with one line of glue along the bottom edge of the flap.

Then add glue around the other edges and middle.


Pet Pocket
Lots of American Girl dolls have a pet, so it's nice to have a special place for the pet. (Grace has a bulldog named Bon Bon, although we opted for a $5 knockoff pet from Wal-Mart.) I'd originally thought about cutting a peep hole through the front of the pocket itself, but ultimately decided that might compromise the durability of the suitcase for airline travel and opted for making the insides cozy and having the pet peek out through the slightly open zipper.

We're going to do something similar as for the peek-a-boo pocket, but we WON'T cut out the back. We also don't need to be quite as careful about an exact fit for the cuddle fabrics since this pocket won't be fully open and we won't be seeing it from the back. We chose two coordinating/contrasting fabrics for this part so look really cute as the pet is peeking out.
For the back of the opening flap, we'll cut out a piece the same size as for the peek-a-boo, but about an inch, so we can wrap it around the bottom of hem of the flap. Glue in place.
For the back of the pocket you want a piece of cuddle fabric that is larger than the opening in every dimension. You can see here the size piece of lattice cuddle I used for the back of the pocket.

I put the glue in bits at a time and tucked the edges deep past where the zipper was.


The doll mattress really does triple duty. It will act as a portable doll bed, a divider between the big girl clothes and the doll section, and has straps/buckles to help keep the doll in place while in the suitcase.

For this particular suitcase we needed a piece of foam that was 12" x 21". This made for a snug, but not too tight fit and was just wide enough to place two sets of straps for two dolls. You may need to adjust the size if your suitcase is slightly smaller or larger. Also, I chose to use 2" thick foam so it would have more of a mattress feel and be a firm divider to keep the big-girl clothes in place, but you could use a thinner foam as well.
Use a pen to mark where you want your straps. I used our dolls to figure out where the straps needed to be. For me that was between the 11 and 12 inch markings height wise, and then at about 1 3/8" from each side, with a width for the doll at a little under 4".

Use a serrated knife to cut your the slits for your straps.

Cut an 18" piece of nylon webbing for each doll. This will actually be a bit longer than you need, but you can trim off the extra later since each type of buckle will require slightly different amounts of strap. Place your straps through the slits.


Now we're going to cover our mattress with super soft cuddle fabric with the straps still inside. (Paris fabric for my Paris-loving daughter and polka dots for my niece since her "favorite color is polka dot.") You'll need a piece of cuddle approximately 17" by 47". This is going to be a bit like wrapping a present but using hot glue instead of tape. I wanted the back of the foam (the side without the straps poking out) to work well as a mattress, so I had the seam be at the top.

After sewing the top closed and while the sides are still open, you'll want to cut slits for the straps to come through on the front.

Then you can go ahead and glue the side closed.


If you're using cuddle fabric, don't worry about tucking in all the raw edges...they won't fray. Just glue them as flat as possible.
Trim your straps to suit the size of your doll and the particular buckle you chose.

Once you've trimmed it, melt the ends slightly with a candle or wax to keep them from fraying.

And hot glue the strap in place around the buckle.

And you'll be all ready to buckle your doll in place.


Finishing the Inside Flap
I thought about covering the entire inside with cuddle fabric, but ultimately decided just to cover the back of the inside. (The back has some bumps from the handle and it was going to be tricky to get the sizing just right. Covering just the opening flap was much simpler and I wanted to keep this simple.)
Cut a piece of cuddle fabric that matches the large lower rectangle of the flap. For us that was a simple rectangle cut to 9" by 13". Cut so the side edges are flush with the trim and there's a bit extra at the top and bottom to tuck under the trim.

Adding Button Hangers
I wanted a place for those cute little doll hangers to hang, and finally figured out the perfect solution. I used a pack of Half Ball Cover Buttons Size 75 by Dritz and covered them with some cuddle fabric. (I was worried the cuddle might be too thick, but it worked perfect...probably best to stick with the regular cuddle 3 or embossed cuddle...not the longer stuff.) The larger buttons match the link above. The others are a smaller size. both worked beautifully.

Just follow the directions on the package for covering the buttons. It's kind of fun to fussy cut the fabric so they match.

Use a doll hanger to mark where you'll want your buttons. (My doll hangers came from a wholesaler, but are similar to doll hangers.)


And from here, your favorite girl should be all set to travel with her dolls.

And we've been having fun making lots of other accessories, like cozy sleeping bags, pillows, and hanging garment bags. Tutorials for those appear on the Fairfield and Shannon Fabrics websites.

DIY Reversible Doll Sleeping Bags

Easy Hanging Doll Garment Bag

Easy DIY Doll Tent  | Reversible Doll Sleeping Bags | |
Easy Doll Hanging Garment Bag |  | Super Easy Doll Puff Quilt |
DIY Hogwarts Robe for 18-inch Doll  |


Really very sweet!
ReplyDeleteI am purchasing all my supplies to make this for my daughter for Christmas! Can you give me a little more direction as to where you placed the buttons for the hangers? Do they go on the inside sides of the bag? And how do the hangers hang from them? THANK YOU!!!
ReplyDeleteThe buttons go on the inside of the main suitcase part and you'll stitch it on through the pocket at the side. It's inside that pocket that you'll tie the knot off holding the button in place. You need a largish button and preferably one that has a little thing that sticks out the back (not a flat button with 2 or four holes going through the front of it.) That gives enough depth behind the button for 1 hanger. Also, I sewed the button on with a bit of narrow ribbon instead of thread for strength. If you sew the button on a bit loosely, you may be able to hang two hangers on it. Let me know if you have any other questions and I'd love to see how yours turns out!
DeleteThank you!!!
ReplyDelete